
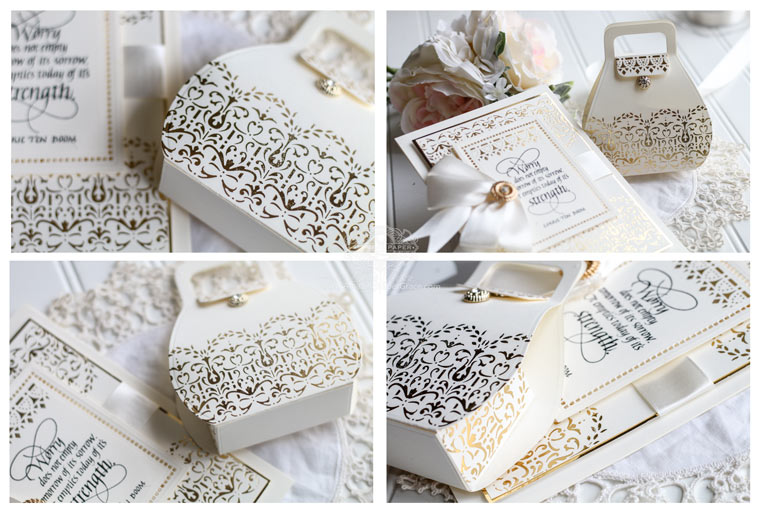
Hi there, Becca Feeken with Amazing Paper Grace here. Today we’re having a blog hop to showcase my new Glimmer Plate collection – The Gilded Age. I love creating ensembles and wanted to be sure to include borders in this collection – Lace Frippery and Gilded Trimmings are already on my favorites list. As I designed them, I thought of all the possibilities of pulling older dies from your stash to embellish with. These are calling out to embellish a bag or box. In fact, these projects were very quick to make!!
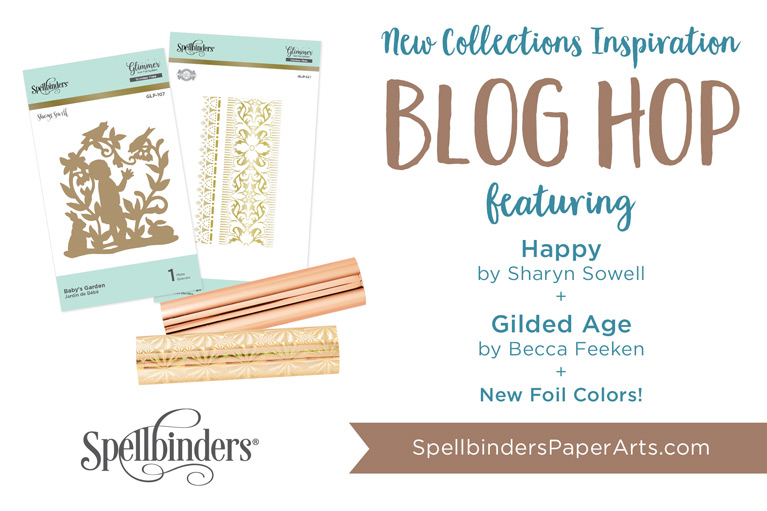

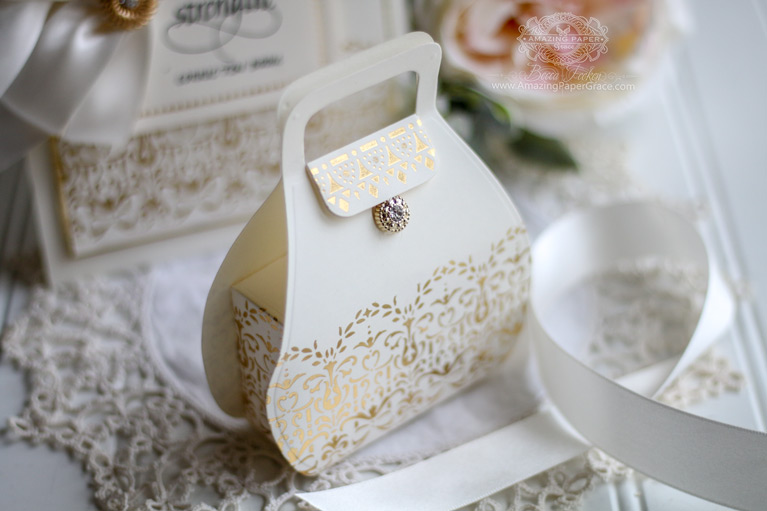
The new foils are absolutely delicious and I’ll warn you, it’s very hard to choose. I landed on GLF-024 Polished Brass. It’s lighter than gold and has a lovely sparkle. I simply took the Favorably Simple Gift Bag Box die and before it was assembled I added border to each of the pieces. Once assembled, the pattern makes it pretty and cohesive!!
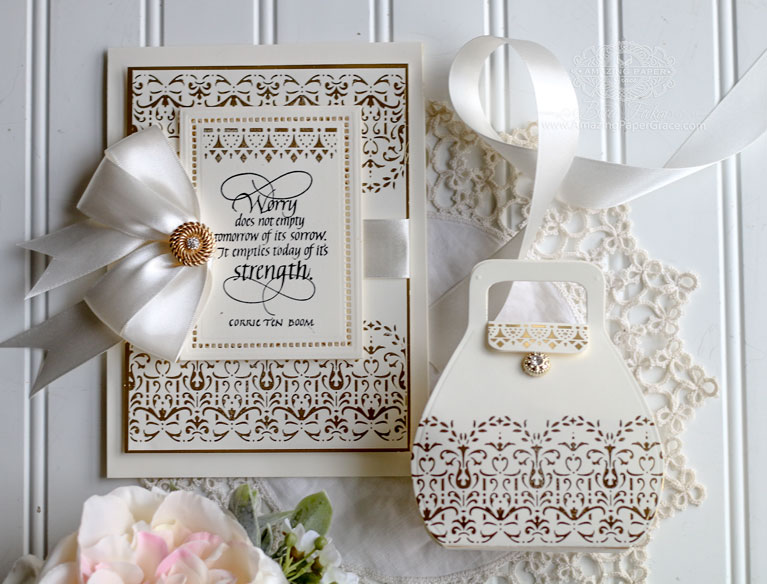
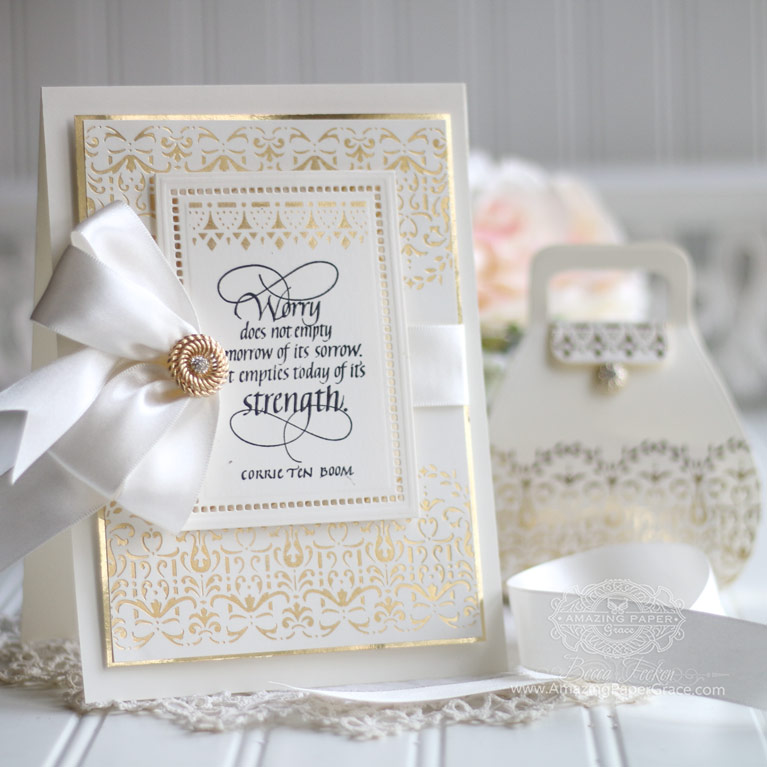
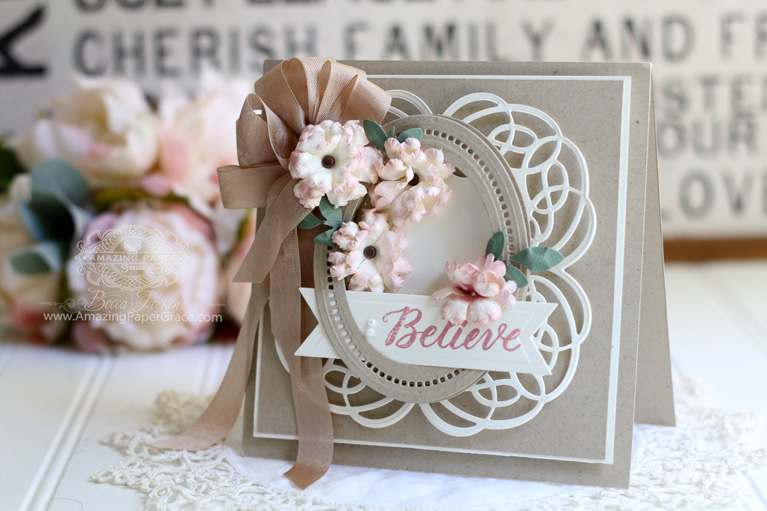
The bag is going to be filled with delectable chocolates and the card will go to a friend that is having a rough time. I reached for one of my very favorite sentiments from Quietfire Design called Worry.
What a way to make things sparkle!!
Feel free to reach out to me! Here’s where you can find me.
Let’s Chat – Find Becca Feeken on Facebook!
See What’s Up – Follow Becca Feeken on Instagram!
Kick Back and Learn – Watch Becca Feeken on YouTube!
Get Inspired – Amazing Paper Grace CREATES on Instagram!
Giveaway:
This Giveaway has ended. To celebrate this release, Spellbinders is giving away a $50 gift certificate to 3 lucky blog readers – selected from the comments across all of the blogs in the hop. Giveaway closes on Sunday, April 7th, 2019, 11:59 pm EDT. Winners will be announced in our blog hop post the following Monday. Winner is responsible for shipping cost, duties and taxes.
Here is the entire link list so that you can navigate through all the incredible makes for the blog hop!!
Link List:
Spellbinders
Becca Feeken
Sharyn Sowell
Tina Smith
Hussena Calcuttawala
Mona Tóth
Janette Kausen
Laura Volpes
Jacquie Dean
Melody Rupple
Desiree Kuemmerle
Anna Komenda
Zinia Redo

Stamps: Quietfire Design – Worry
Ink: Versafine Black Onyx
Paper: Neenah Classic Crest – Natural White – Cover – 80lb smooth, Gold Mirror Card
Accessories: Amazing Paper Grace Dies, Lace Frippery, Gilded Trimmings, Favorably Simple Gift Bag Box
Thank you so much for stopping by!! Be well, be happy, be safe friends!


Wonderful card and gift bag. I love the foiling! It makes the card so elegant.
Elegant!! No other word needed to describe the card. Love the gift box as well. The glimmer machine is on my wish list—so fun!
My goodness! Both projects are beautiful!!
Good morning Becca, I agree so elegant!!!
Good luck everyone!!!
Have a good one!!!
Loopy Lyndaxxx
Wow ! Gorgeous projects! I love the little gift bag box and the foiling adds so much glamour!
So elegant. The purse and card so perfect for a wedding!!
Beautiful these new glimmer plates are gorgeous. Love the card but that purse is over the top. Hope you have a good day.
Lovely projects you have made with these plates I can tell they are going to be a must have in my library of toys
What an elegant card and treat box the foiling is awesome…
well done and tfs
I met you when you were in Phoenix this January and was in yours class making your framed card that everyone loves. Just imagine how much fun it would be to have the designs finished with the glimmer products. Definitely on my wish list and thank you for sharing all the wonderful creations that you make.
This is stunning! The polished brass is perfect
This card and. exquisite purse would brighten any person’s day!
Your projects are stunningly elegant! The glimmer products take any project to a new level of professionalism!
Uber Gorgeous! Your project screams Classy and Elegance!! Love all the foiled details against the white bgs!! Absolutely love it!
This is a beautiful set, Becca. Absolutely gorgeous!!!
Your projects are so elegant.
Stunning! I did not think foiling could be so beautiful. Love the sentiment and how you embellished it with the foil. You are an inspiration to all of us.
Beautiful and elegant cards. I really like the borders!
Beautiful creations!
The foil adds so
much to the designs.
Carla from Utah
Oh, how pretty and elegant! I love the gold and those delicate lines in the images… the bag is so sweet! Those buttons are lovely.
As usual, all your projects are elegant and lovely. I love foiling and nothing looks more beautiful and rich.
I love your card and the little purse. I think my granddaughter would love that.
What an incredibly beautiful ensemble! Wow!
Just stunning . Ya’ll come up with some of the most beautiful ideas. Thank you so much for keeping us inspired. God bless…Denice with a “c”
Love the card but the little purse is lovely
Love your beautiful new designs. Lovely as always!
I love the saying that you used. I need that in my life! Lovely card.
Wow Becca, this is just a fantastic release. Love the card and bag to match, how lovely!!
Hugs
Ann Robbins
I love all of your new designs and the projects that you create! These projects are beautiful!
My goodness are these ever beautiful!! The gift bag is so elegant and the card is exceptional.
Beautiful card and box!!
WOW! Fabulous set!!
Simply gorgeous! That gift bag is amazing!
Beautiful Beautiful projects, the card, the purse!
Who wouldn’t be cheered up by chocolates in such a lovely package.
Hi Becca,
I just love your projects, thanks for the giveaway
Rene from OZ x
Becca, you ensemble is BEAUTIFUL! I’ll DEFINATELY have to get the Polished Brass foil too! LOL Isn’t it funny how a little sparkle does SO MUCH for us? ;) Your card is GORGEOUS with your Rectangled Hemstitch Dies & your Lace Frippery & Gilded Trimmings Glimmer Plates! I for one, ALREADY have a hard time picking just ONE of your Glimmer Plates! LOL I have been TOTALLY SMITTEN by them! ;)
How beautiful! I am loving the foiling.
Beautiful works of art.
WOW, those are gorgeous. I love the feminine look.
The box looks perfect for Mothers Day. I like your new designs.
Wow! Gorgeous projects!! They are so elegant in gold! <3
Beautiful projects, so elegant!
I am a huge fan of your work and can’t believe I didn’t subscribe to your newsletter sooner! Thank you for all your design work and inspiration.
Great project and that makes so much since using these lace gilding plates with the older dies! Love the polished brass which is such a beautiful sparkling foil color! Am especially loving the Worry sentiment by Corrie Ten Boom!!
OMG these projects are breath takingly GORGEOUS!!!!!
Very elegant projects, Thanks for the chance to win.
Wow. These projects are absolutely gorgeous
Beautiful projects! The lacy border makes a beautiful frame for the sentiment on the card.
Beautiful card and gift box set!
Absolutely stunning! Love the sentiment you used. Wonderful inspiration and thank you for sharing your talents.
Your designs are always so elegant and beautiful Bekka! Thanks for sharing your awesome talents with us.
Lovely gift bag!
Bekka, your designs are always so stunning. I totally love the purse. Thanks for sharing.
Stunning. Each item looks so much more elegant with the foiled designs.
WOW! You make such beautiful cards! I am new to the craft and am blown away by some of the amazing things you guys make.
I love the purse and your card.
Love the foil and design
I love your Gift Box purse with all the nice gold foil,very pretty.
Your projects are beautiful!
So beautiful. I was trying not to get into the foiling but your pieces and Sharons really make me want to lol.
Absolutely gorgeous!!
I just found the foil technique and am fascinated by how beautiful everything is. Thank you for sharing your beautiful projects.
Such a beautiful, elegant card and gift box.
Thanks so much for sharing…
Nice job. thanks for sharing
I love the gold! what an elegant beautiful card and bag!
Beautiful cards etc. TFS ?
Your foil work is exquisite, Becca. Your designs are awesome. tfs
I love the foiling. I have to learn how to use it.
Such elegant designs and the foil just makes it so.
The Glimmer Hot Foil’s are so pretty. Love the look of the one you chose. It is really perfect for the items you crafted.
Awsome cards! Thanks for the chance to win.
Gorgeous hot foil glimmer plates and your right it’s so hard to choose a colour of foil. Thanks for sharing your creativity with us. X
WOW! This is absolutely amazing.Love the gift bag.
These are beautiful. The foil adds such elegance. A lovely gift for your friend.
What a beautiful card! Those borders are amazing! This might be your best release yet!
Wow! All of your projects are beautiful! The gold foiling looks amazing!
Such a beautiful design! Perfect for foil! I love the gift box.
Your projects are so elegant!
So very elegant, Becca. Love everything you do.
Becca, it boggles my mind how you have such a gift for such intricate designs. Truly beautiful! I don’t recall having seen a more classy & elegant card & that sentiment, coming from Corrie Ten Boom, touches my heart & makes me pause when I remember reading what she went through. What a quiet, yet stunning colour the foil is too. Thank you.
This is so beautiful! I hope to create works of art like this myself. :)
Gorgeous projects…I am new to foiling and the results look pretty amazing to me…will surely try soon!!Thanks for sharing
That elegant purse makes my heart happy ^_^
The card is beautiful but oh my goodness…that purse! So elegant and cute!
Elegant!
This set would make a wonderful set for any wedding. And would be a one of a kind gift. Beautiful card and a purse for the cash or check you would give the happy couple. Then I thought what a perfect 50th Anniversary set as well. So many reason to have this set on hand. Thanks for all the beauty and ideas.
Your new things are so elegant! That cute purse is to die for, perfect for a daughter or friend’s special gift.
I really love how you used the new products! Amazing work!
I love your work, you are so creative. Love that box!
Your card and bag are divine!
Beautiful and elegant.
Love the cards. I wish I could find Quietfire Stamps out here do you think that Spellbinders will ever carry them?
The gold is gorgeous.
Really adds a lot of “class”
to the projects. thanks
for sharing.
txmlhl(at)yahoo(dot)com
Oh Becca! Absolutely stunning! My wish list grows as I visit your blog :o)
Hugs
Anne(UK)x
Your projects are beautiful!
Gorgeous! Love the little purse and wonderful card. Thanks for sharing.
So pretty! I love the elegant designs!
Absolutely gorgeous new products and stunning projects- so elegant!
Stunning products and the cards are just beautiful!
Awesome card!
These are absolutely gorgeous and so elegant! I love all that foiling. Wonderful projects. I hope things work out for your friend.
These are beautiful boxes!
Your cards and projects are always spectacular!
Becca both projects are so inspiring and have your artistic aesthetic that I adore and that inspire me. Thank you!
Amazing projects! They are so beautiful and elegant!
So gorgeous!!! Love the gift bag. I definitely need to add that die to my arsenal. The foiling takes it to a whole new level. So creative.
Stunning projects. The gold adds such elegance. Thanks for the inspiration
Hi Becca! You’re one of my favorite designers and trust me I have several of your dies! LOL! Your card and matching treat box are absolutely stunning! The gold foil really makes some simple designs look amazing like it took you forever to create! Love that your designs can mix and match with older ones! Beautiful sentiment! That just warms my heart that you’re giving this to a friend who needs some blessings! Tfs Hugs, Christine
Your projects are absolutely gorgeous. The foiling is amazing.
[…] Becca Feeken Sharyn Sowell Tina Smith Hussena Calcuttawala Mona Tóth Janette Kausen Laura Volpes Jacquie Dean […]
Your papercrafts are always beautiful.
Beautiful card!!
So very beautiful Becca! I love the sweeeet little purse! More for my wish list!
Such a gorgeous elegant card and little purse favor. Thank you for sharing.