Hi there blog friends!
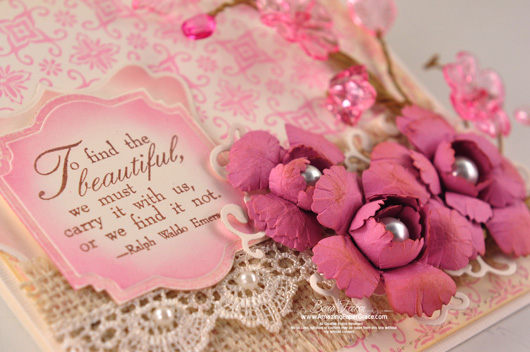
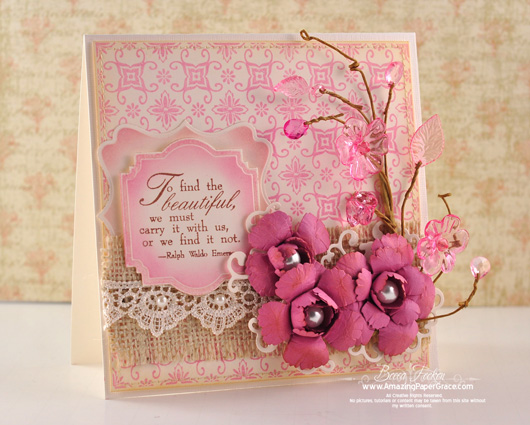
  Got ten minutes?  I have a quick project I’ve put together and it can be done in less than 10 minutes.  Yes, I know that’s hard to believe but it’s true.  Not only that, since I’m all expert and everything with that video camera that almost send me to the looney bin, I’ve already done a video to go along with the project.  Like I said, I know it’s hard to believe, lol!  Here’s a little sneaky peek at the project and you can see it and the video over at the Our Daily Bread Designs Blog

pinTHIS SHAREthis TWEETTHIS EMAILthis
  • Christine Harrop, Oxfordshire, UKOctober 13, 2011 - 6:32 am

    Hi Becca, just watched your video on ODBD blog. To say this is so simple it is just so effective. Thanks for sharing this.
    love Christine xReplyCancel

  • ColleenB.October 13, 2011 - 6:57 am

    Having internet problems on this end so was unable to watch the tutorial video but your gift card pockets are lovely.
    Thank U 4 sharing
    ColleenB.ReplyCancel

  • FrancineOctober 13, 2011 - 7:04 am

    We all need some short time project. Merci. FrancineReplyCancel

  • PamOctober 13, 2011 - 7:28 am

    Fantastic Video as always, Becca! Can’t wait to make these for my grandkids. We always give gift cards for Christmas and now I will have an adorable way to present them. Thank you so much.ReplyCancel

  • Dee in N.H.October 13, 2011 - 7:39 am

    Fabulous Becca! Pretty and do-able with your great tutorial!ReplyCancel

  • JeanOctober 13, 2011 - 7:45 am

    Hi Becca – as always, your project is elegant and lovely. Thank you for sharing. Take care, Jean.ReplyCancel

  • Marilyn ClarkOctober 13, 2011 - 7:55 am

    Thanks for the video, I think I can do this…..with your help. God bless and have a great day!ReplyCancel

  • Lillian ChildOctober 13, 2011 - 8:28 am

    Awesome and love that it’s QUICK!!!ReplyCancel

  • Jean COctober 13, 2011 - 8:35 am

    Becca,
    Great video with easy directions. I think I could do that. Thanks for sharing.ReplyCancel

  • DebbieOctober 13, 2011 - 8:41 am

    You make it look so easy, I’m going to attempt it :-) Where can I purchase the Scor-tape you used? Thank you.ReplyCancel

  • PatriciaOctober 13, 2011 - 8:43 am

    Thank you for that Becca, it is fabulous and so quick
    Off to get my papers together to have a go.

    God Bless

    Patricia xxReplyCancel

  • Pet BarnesOctober 13, 2011 - 9:07 am

    I love it! I will definitely be making them . You are such an inspiration. Thanks for sharing your talent.ReplyCancel

  • BernieOctober 13, 2011 - 11:21 am

    Oh My Goodness that was amazing! Your EASY isn’t always so easy for me but I think I can actually do this in 10 minuets. I can’t wait to make these! LOVE it!!! Thanks so much!
    Blessings BernieReplyCancel

  • MaryannOctober 13, 2011 - 12:26 pm

    This is so gorgeous too Becca. You´re just sooooo talented girl and makes some awesome things. I love it.ReplyCancel

  • GeorgetteOctober 13, 2011 - 2:39 pm

    just look at your new video and this is so beautiful
    and fast to do
    thank very much showing how to doReplyCancel

  • Vicky SchmidtOctober 13, 2011 - 5:03 pm

    Wow I love the gift card holder. I think I can also turn that into a special card for my grandchildren. Thanks BeccaReplyCancel

  • Francie (Montreal)October 14, 2011 - 6:16 am

    What a dandy project and great tutorial video! Your creativity never fails to impress. Thanks for the great idea.ReplyCancel

  • lois skiathitisOctober 14, 2011 - 6:42 am

    Yes that was easy enough that I think that I could do that too. Great video Becca. As always Becca, TFS!!! :-DReplyCancel

  • Helen BorrowmanOctober 14, 2011 - 3:22 pm

    Becca, I look forward to seeing your next idea. Thanks so much for sharing. Great video.ReplyCancel

  • jean w.October 14, 2011 - 4:36 pm

    Becca thanks so much for the video! What a great way to give a gift card!ReplyCancel

  • SusanOctober 15, 2011 - 6:33 pm

    Hi Becca,
    Your video for this gift card holder was easy to follow and gives a lovely finished project. I can’t wait to make some! Thanks for all you do to share your ideas with others.ReplyCancel

Hi there blog friends. Yes, I know I’ve been missing. I decided to try to conquer the new (had it since January) HD video camera and software I have.  Sheesh, I don’t think I’m winning but at least I have something to show for my absence and I’m encouraged to keep with it.  It’s so much of a better setup for me but it’s honestly waaaaay, way, way over my head.   Oh, the grumbling that came from my room.    It seems that I had to research every next step to figure things out.  Anyway, I’m riding without my training wheels now and hopefully this will let me produce better videos in the future!   Be sure to click the resolution button (it probably says 240p or 360p) and watch in HD, it’s much clearer!!!!

I did a walk through of how to make the triangle shaped Christmas Tree favor boxes that I showed on my JustRite Stampers Post and hopefully I can get to some of the tutorials and such that have been piling up on my to do list.    Enjoy!!


Oh gosh, I’ve missed you all!!

pinTHIS SHAREthis TWEETTHIS EMAILthis
  • KathyOctober 9, 2011 - 10:29 pm

    AWESOME!!!ReplyCancel

  • AndreaAOctober 9, 2011 - 10:29 pm

    Thank You Becca!!!!
    I am a visual person.

    You make everything look so easy.
    I don’t have this set yet.
    I would like to make these for my great nieces and nephew for Christmas with their names and date on the bottom.
    Thanks for all you great ideas and wonderful projects!!ReplyCancel

  • Becky DOctober 9, 2011 - 10:51 pm

    Thanks so much for this tutorial Becca! I absolutely loved these trees when I saw them before and I was hoping you would do a tutorial! I am a visual person too and it helps me immensely to see it in action :)ReplyCancel

  • BernieOctober 9, 2011 - 10:53 pm

    BRILLIANT!!!! Wonderful to see you back. I am electronically challenged so I admire you for figuring out how to use your video equipment. You’ve done a beautiful job but I hope you have taken some time for yourself.
    Blessings BernieReplyCancel

  • JalineOctober 9, 2011 - 11:11 pm

    Wonderful tutorial. Thank you so very much and I love your tree.ReplyCancel

  • SusanOctober 9, 2011 - 11:14 pm

    Wow — what a fabulous tutorial! You make it all look so simple. Thanks for sharing your amazing talents with us Becca.ReplyCancel

  • Linda W...October 9, 2011 - 11:30 pm

    OMGoodness Becca!!!! you are a gifted person… thanks for shairingReplyCancel

  • LMcBurneyOctober 9, 2011 - 11:39 pm

    Super cute tree box! I always get inspired by your tutorials! ThanksReplyCancel

  • Linda GreenOctober 9, 2011 - 11:51 pm

    I always love your tutorials!! You make everything look so easy! Keep up the wonderful work!ReplyCancel

  • CyndeOctober 10, 2011 - 12:37 am

    Thanks Becca, You are so Multi-Talented you never cease to amaze me!ReplyCancel

  • MaryannOctober 10, 2011 - 1:26 am

    WOW thanks so much for another awesome tutorial here. It´s really great and soo easy to follow, that even a kid can make this tree now. You´re just amazing to get all these wonderful ideas always and thanks so much for sharing them with all of us here.
    Have a great time ahead hun and lots of fun, I hope.ReplyCancel

  • PatriciaOctober 10, 2011 - 1:48 am

    Thank you Becca,
    You have made that look soooo!!!! easy I know even I will manage follow it.
    I am a very visual learner and that is just so fantastic.
    Glad to see you back I was rather worried about you.

    God Bless

    Patricia xxReplyCancel

  • Nic KeilyOctober 10, 2011 - 1:49 am

    Thank you for taking the time to prepare the tutorial. It was fantastic. I really loved being able to see step by step how you made the box. You make it look so easy – here’s hoping it is!ReplyCancel

  • Christine Harrop, Oxfordshire, UKOctober 10, 2011 - 1:54 am

    Oh, we have missed you too Becca! Thank you for sharing this tutorial – I am one of those visual people. It all makes much more sense when I see it.
    love from Christine xReplyCancel

  • Larrik (??????)October 10, 2011 - 2:18 am

    These boxes are gorgeous!!
    Thanks for your brilliant idea and video tutorial !ReplyCancel

  • JessicaOctober 10, 2011 - 2:58 am

    Very cute idea! TFSReplyCancel

  • GerryOctober 10, 2011 - 3:58 am

    Thank you for the tutorial. Your tutorial production was excellent. Good luck with your new camera.ReplyCancel

  • Debbie BOctober 10, 2011 - 4:31 am

    Talk about missing someone. I have checked every day just to see if I missed something. You are one of my happy luxuries. Thank you for all you do!ReplyCancel

  • EileenOctober 10, 2011 - 4:53 am

    Thank you so much for this visual tutorial, you make everything look sooo easy!
    Pleased to hear you managed to come to terms with your camera,
    LOL EileenReplyCancel

  • EllenaElizabethOctober 10, 2011 - 5:10 am

    So pleased you’re back Becca! I might give the tree a go now i have watched your tute. Thanks.ReplyCancel

  • DeniceOctober 10, 2011 - 5:58 am

    I honestly think you should be doing a crafting show on television. You are an excellent teacher and way better than what I have seen on the crafting shows. Thank you so much for sharing and making crafting / card making so much fun. You take the frustration out of the picture for all of us here in computer land. We love you. God bless ……. DeniceReplyCancel

  • Barbara WilsonOctober 10, 2011 - 6:10 am

    Thanks for tutorial. You always make things look easy.ReplyCancel

  • Marilyn ClarkOctober 10, 2011 - 6:10 am

    Glad you are back. Thanks for the video. You and your camera are going to get along just fine.ReplyCancel

  • IreneOctober 10, 2011 - 6:21 am

    Thanks for all of the effort with the new equipment…it was a great video!ReplyCancel

  • lois skiathitisOctober 10, 2011 - 6:27 am

    I’ve missed you too Becca, but I had a feeling that you were behind the scenes creating something. Thanks for the great video tutorial. Being a visual learner it has been very helpful. As always Becca, TFS!!! :-DReplyCancel

  • ValleyOctober 10, 2011 - 6:31 am

    Love your testimony for our LORD!! Thanks also for the great video. Thank you for using your talent for Him!!ReplyCancel

  • Mary HOctober 10, 2011 - 6:58 am

    Thanks Becca!! That is really cute. :)ReplyCancel

  • Carol LOctober 10, 2011 - 7:31 am

    Love your tree box Becca, but please…won’t you make the video for the pop up snowflake card that you said you’d make (I think last year). In five days I’ll be going away on a week’s stamping retreat, and usually work on my Christmas cards. I know a lot of other ladies have asked you for that video. I’d sure LOVE to have the knowledge to make that pop up. Thanks much. CarolReplyCancel

  • EliOctober 10, 2011 - 7:37 am

    Becca,
    This is so fabulous. It will sell a lot of stamp sets and bless a lot of people with precious gifts. Thanks for the tutorial.
    EliReplyCancel

  • FrancineOctober 10, 2011 - 7:42 am

    It is nice you are back. The video is perfect clear , simple pleasant to look Thank for make it for us. Francine.ReplyCancel

  • PatriciaOctober 10, 2011 - 8:26 am

    Becca, Patricia here again!!
    Have you ever thought about doing a DVD of some of your “Tuorials”.
    I am sure it would sell “Like Hotcakes”
    Although I live in the UK, I for one would “Jump Hoops” to be able to get it.

    Patricia xxReplyCancel

  • MickieOctober 10, 2011 - 8:47 am

    Thanks for the video, very well done me lady!! You are so ingenious.ReplyCancel

  • Bonnie WeissOctober 10, 2011 - 9:50 am

    How in the world do you come up with these ideas and then create them??!! Does your imagination ever get any rest?? This is an amazing project with very clear, concise instructions Becca … thanks once again for sharing your talent and creativity with all of us.ReplyCancel

  • Monica LoreOctober 10, 2011 - 10:16 am

    Thanks so much for sharing Becca!
    Just a note – in raising the resolution, you risk slowing the video down. I had to stick with 480 otherwise there was drop out.ReplyCancel

  • Cindy H.October 10, 2011 - 10:57 am

    What an excellent tutorial!! Thank you so much!!! Love these little tree boxes :)ReplyCancel

  • DOTTIE MCFADDENOctober 10, 2011 - 10:57 am

    Do you have a degree in engineering? I ask because you must have training to design all the things you do. I can’t imagine how you come up with all the wonderful design and then teach us how to do them too. You are fabulous!!!!ReplyCancel

  • StephanieOctober 10, 2011 - 11:04 am

    Glad you’re back. I was worried.ReplyCancel

  • RubyOctober 10, 2011 - 11:06 am

    Wow… great tutorial! I too am visual so thank you very much for the instructions. These tree boxes are just great and will look so beautiful on my table. I just hope I will have time to make them, because you did make it look easy, but I’m all thumbs! haha tks again!ReplyCancel

  • Jane SuperOctober 10, 2011 - 11:22 am

    Becca, Thank you Soooo much for the instructions on those beautiful tree boxes. You did an excellent job of showing us just how to make them.
    Thank you again!!!ReplyCancel

  • GeorgetteOctober 10, 2011 - 11:25 am

    love the tree box that will make a good gift and add candy inside
    thank for showing
    like very much your video
    thank again
    have a very good dayReplyCancel

  • BrendaOctober 10, 2011 - 12:45 pm

    Missed you too. Glad to see you back!!!ReplyCancel

  • Laura ~ Layers of ColorOctober 10, 2011 - 12:59 pm

    Oooo, all these projects are marvelous, Becca! Wonderful, clear and easy steps to your tutorials! It was worth every frustrating moment with that new camera! Superb!ReplyCancel

  • Jean PippOctober 10, 2011 - 1:32 pm

    Becca. Just absolutely love the Christmas tree box…it is fabulous. I will be doing a craft show in a month and I am going to try to make some boxes. Thanks as always for sharing you beautiful work….ReplyCancel

  • Suzi YerkesOctober 10, 2011 - 1:56 pm

    Thank you Becca for being a kind and amazing person for sharing your talents wil all of us. You really do beautiful work. Thanks.ReplyCancel

  • Cheryl StaufferOctober 10, 2011 - 2:24 pm

    Thank you so much, Becca, for the video on how to make your wonderful tree box!! You are so creative and create such gorgeous items. I appreciate you sharing your talent with me and all of us. I hope to find some time soon to try making one of these!!ReplyCancel

  • stephOctober 10, 2011 - 2:42 pm

    this is super, love it.ReplyCancel

  • Carol E BrookerOctober 10, 2011 - 3:13 pm

    Wow! That is amazing thanks so much for sharing it. You make it look so easy.ReplyCancel

  • Judy McMullenOctober 10, 2011 - 4:13 pm

    Thanks, Becca, for another terrific tutorial! Love this Christmas tree box!!ReplyCancel

  • TerriSOctober 10, 2011 - 4:27 pm

    Fantastic! I’m a visual learner, so I’m very grateful that you ‘took the training wheels’ off! Great job!ReplyCancel

  • Jeanette DukeOctober 10, 2011 - 5:36 pm

    How kind you are to share your wonderful creations. I can’t wait to make this.
    Thanks for all you do and the video was so clear.ReplyCancel

  • mary friederichsenOctober 10, 2011 - 5:41 pm

    Becca this was wonderful! You did a great job with this video!

    Thank you so much for sharing, It is nice to see you back again,I missed you too!

    Blessings,
    MaryReplyCancel

  • AnnelieOctober 10, 2011 - 6:05 pm

    Love all your tutorials — so much easier to understand than written directions, for me anyway. Thanks for much for taking the time to do this for us, Becca.ReplyCancel

  • Joyce M (Scotland)October 10, 2011 - 6:06 pm

    Love love love your boxes – did try a run on my own but now that you have such clear video instructions can’t wait to try it out again – the proper way!! Thanks for sharing your amazing talent.ReplyCancel

  • caroline hillOctober 10, 2011 - 6:13 pm

    Thanks Becca loved your tutorial.You put Martha to shame.lolReplyCancel

  • ColleenOctober 10, 2011 - 7:14 pm

    Your videos are always such a pleasure to watch. Your voice is soothing and your technique is spot-on. I will have to see about trying a box like this! Thank you for taking time to do these tutorials.

    May God continually bless you. ?ReplyCancel

  • RufusOctober 10, 2011 - 8:05 pm

    BECCA!! I’ve missed you. Love your tutorial on the tree box, new camera is very nice! Hope it hasn’t driven you to crazy. It was really nice to find you in my in-box. Have a great week,
    R/ReplyCancel

  • Theresa RomaniOctober 10, 2011 - 8:21 pm

    Awesome tutorial and real “outside of the box” thinking for this stamp, LOL.ReplyCancel

  • Becky GreenOctober 10, 2011 - 8:29 pm

    WHAT A BEAUTIFUL JOB Becca!!!!!!!! You did a WONDERFUL JOB on the video!!!!!!! Thanks for showing us!!!!!! How EASY you made it look, & without a template to boot!!!!!!!! :) SUPER!!!!!!!!!!!!!!!!!! :)ReplyCancel

  • Charlotte ZweigoronOctober 11, 2011 - 8:19 am

    Thanks for the tutorial. I had to try it right away! Mine came out a little more squat because I was using a Cheery Lynn doily die cut which I cut into pieces along the solid areas within the doily to make the four sides very lacy. I am busily experimenting with other sizes for the four sides because I don’t have any of these wonderful stamps. Got to make do with what I have! So good to have you back on the tutorial trail! I feel silly saying I love this project because I love ALL your projects!! Just wish I could get some of your cards to add to my collection of my favorite designer’s works… You are #1 in a circle of four including Tim Holtz, Andrea Ewen and Teresa Kline. #1!!!ReplyCancel

  • HeatherOctober 11, 2011 - 8:38 am

    I was so happy to hear all was well – and that you had a tutorial for us!
    You are such a whipper-snapper. I would have had to have the template then search for the stamp, whereas you create as you go along. A ‘true’ use of creativity-lol. I’ll be making these as table toppers (I may leave off the trunks, we’ll see) and will try using a vellum with a battery candle inside. Won’t know if I don’t try, right?
    Thanks, as always, for sharing with us Becca!ReplyCancel

  • Carol WOctober 11, 2011 - 9:35 am

    Great to see you back, and the tutorial looks wonderful (I took your advice and watched in glorious HD)!
    As others have mentioned, I really love how you walk us through how you created a shape/idea/etc. by using straight-forward spatial reasoning rather than a template. Templates are great, but your work empowers me to figure things out myself (especially when forging new paths that don’t have templates!). Even when I just re-create a project you’ve already perfected, the “constructive” part of my brain gets wonderful exercise. Thank you so much for that.ReplyCancel

  • RockyOctober 11, 2011 - 3:23 pm

    Thanks for a really clear tutorial, it was so easy to follow. There’ll be tree boxes all over my house this year !ReplyCancel

  • NimueOctober 12, 2011 - 6:33 pm

    Thanks so much for the tutorial. Your ability to think outside the box amazes me. You always find different ways to use things. Love it.ReplyCancel

  • sandie carterOctober 12, 2011 - 8:09 pm

    Thank you so much for the wonderful tutorial. It would have taken me ages to try and work out how to make this gorgeous little tree box. Thanks you for sharing your never ending talents on your blog – you are truly amazing!!ReplyCancel

  • SaBrinaOctober 13, 2011 - 8:42 am

    Thank you so much for the tutorial! I am a little intimidated by the difficulty of it, but I will give it a try! Once I have the proper stamp set! Ms. Becca you make it look sooooooo easy. Once again, beautiful work awesome talent. SaBrina B.ReplyCancel

  • Sue AlgOctober 13, 2011 - 11:35 am

    You are truly a paper engineer. To have the vision to create a box from a triangle stamp is a wonderful talent. I thought your video was great and it appears you have learned how to use your new equipment. Thanks for much for sharing your videos because I think most people are visual learners.ReplyCancel

  • Dee DiGiambattistaOctober 14, 2011 - 9:16 pm

    Becca, this is wonderful!! Thank you so much!!!!!!ReplyCancel

  • AnneOctober 15, 2011 - 10:04 am

    Becca, Love all your cards and Turtorials. I have a Beeca file on my computer! Would you please do a step by step photo turtorial on how to make this Christmas Tree Box? I tried to write down the steps as I was following the vidieo (twice), but I am sure I missed some steps.

    Thank you so much for sharing.ReplyCancel

  • chaunOctober 19, 2011 - 3:16 pm

    Very clever! Great video tutorial! Thanks!ReplyCancel

  • Dee DiGiambattistaNovember 3, 2011 - 3:21 pm

    Becca, you are brilliant!! I made one of these and I was okay up until I had to tape down the flap and I taped the wrong one down. So close, I should have taped the one next to it. I Will try it again and I’m confident I will be successful. I am going to try to make this as an advent for my grandson for Christmas, I think it would be wonderful!! Thank you for your great ideas!! P.S. I hope this is okay with you.ReplyCancel

  • Conceição VarellaNovember 9, 2011 - 11:40 am

    Este trabalho e de extremo bom gosto. Lindo… lindo… lindo! Parabéns!ReplyCancel


Hi there friends!  Thanks so much for your kind words yesterday, I particularly enjoyed working on that project.  The same is true for today . . . This week is brimming with new releases so I have a card to share with you today –  it’s a Z Fold Card – I thought it would work perfectly with the layers I wanted to have. The set I’m sharing is from JustRite Stampers and is called Grandma’s Doilies.  I’m also sharing Lace Borders that were released yesterday as well as the inside sentiment from Old Friends, also being released today. I sorted through my Spellbinders to find out what would stack up for this card. 


So . . . on the bottom I started with Spellbinders™ Classic Scalloped Circles LG, on the next layer up I used Spellbinders™ Fleur de Lis Motifs, two more layers of scalloped circles and finally Spellbinders™ Standard Circles LG.  When the left side border is pulled the card opens up.  (The sentiment inside says You Are the Friend Everyone Wishes They Had)


So, if you’ve been looking through a JustRite Catalog or have clicked over to see any of the sets you may have noticed a boxy set of marks that almost looks like a bar code – It’s actually a QR Code.  As part  of JustRite’s October Release they are introducing QR codes to all their new packaging and their catalogs.

CL-02190 ShabbyChicLabelsFour-qrcode_330233 (2) QR codes are popping up everywhere and you may have wondered what they were. What is a QR (Quick Response Code)?  Scannning the QR code with your phone will bring you directly to a website or landing page.  The JustRite QR Codes on the packaging and in JustRites Catalog will link a stamp set to JustRite’s Design Gallery for that set.  Now you can scan the code with your phone to see what your favorite designers have created with a set.  You can use your smartphone to access the design gallery for your stamp set from your craft room when you are ready to use your set or from our mini flyers or catalogs when you are sitting in a car waiting to pick up your child from a sporting event!!

CL-02190 ShabbyChicLabelsFour-qrcode_330233 (2) Here is a smaller version of our Shabby Chic Labels Four QR code for you to play with if you have a smart phone!!  Very cool huh?

Here are some of the current QR apps – for your iPhone – Red Laser (free),  NeoReader (free),  Optiscan ($1.99)  For your Android Phone – QR Droid.

Blog Candy Alert – Don’t forget that there is Blog Candy on the JustRite Blog – it’s a $50.00 shopping Spree.  To enter to win go to the JustRite Blog and answer the blog candy question.  The Blog Candy is open for comments until Friday Night at 12 pm EST.  The winner will be announced on the JustRite Blog on Monday October 3rd during the release post.  Good luck to everyone!

SUPPLIES I USED
Stamps: JustRite Stampers –  Grandma’s Doilies, Lace Borders, Old Friends
Paper: Prima Romantique, Bazzill
Ink: Versamark
Accessories: Spellbinders™ Classic Scalloped Circles LG, Spellbinders™ Fleur de Lis MotifsSpellbinders™ Standard Circles LG, seam binding, Recollections Pearls, Pearl Pic, Ivory embossing powder

Thanks so much for peeking in on what I’m working on.  Here’s a list of JR Designers who have creations today too!

JustRite Inspiration
Becca Feeken
Debbie Olson
Mona Pendleton
Sharon Harnist
Kathy Jones
Kazan Clark
Stephanie Kraft
Heidi Blankenship
Michele Kovack
Sankari Wegman
Kellie Fortin 
Angela Barkhouse
Barb Schram


pinTHIS SHAREthis TWEETTHIS EMAILthis
  • Kelly SasSeptember 29, 2011 - 9:15 am

    I think if I got this card from a friend it would bring me to tears – of happiness that a friend would make such a beautiful card and give it to me!ReplyCancel

  • barb schramSeptember 29, 2011 - 9:17 am

    Wowsers, Becca! You do work wonders with paper, ink, and dies! Just lovely, my friend!ReplyCancel

  • CyndieSeptember 29, 2011 - 9:23 am

    >Gasp!< Can it get any better than this? absolutely stunning! Love that z-fold, so clever to put a new spin on an old favorite!ReplyCancel

  • Karen WallaceSeptember 29, 2011 - 9:28 am

    These new sets are just gorgeous, beautiful card!!! I’m so glad some of these match the die cuts.ReplyCancel

  • Marge R. (mer)September 29, 2011 - 9:38 am

    Wonders never cease when it comes to your creative ability!!!ReplyCancel

  • GloriaSeptember 29, 2011 - 9:50 am

    Becca, Your work is sooooooooooooooooo beautiful!

    The joy you bring to my heart every time that I look at your work! And that is often!

    I want so much to be able to make bows like you! They are gorgeous!

    Love so much this last card and the inscription inside. So lovely!

    I thank the Lord for you and sharing your talent.

    Lovingly

    GloriaReplyCancel

  • Judy WilliamsSeptember 29, 2011 - 9:54 am

    This card is lovely. I had some things to add to my “must have” list after I was able to syop drooling.ReplyCancel

  • Marilyn ClarkSeptember 29, 2011 - 9:56 am

    I agree with Gloria. God bless.ReplyCancel

  • Linda ESeptember 29, 2011 - 10:00 am

    Becca, this card is stunning. I love all o f the layers and the fancy fold!ReplyCancel

  • Francie (Montreal)September 29, 2011 - 10:03 am

    Oh my! This is perhaps the most beautiful and cleverly constructed cards I’ve ever seen on your blog. And that’s saying something. The sentiment is touching; the layering is spectacular and brilliant; and I really like the new JR lacy borders and doilies. I give this a “12 out of 10” in all categories. Thanks Becca for making my day.ReplyCancel

  • Gloria WestermanSeptember 29, 2011 - 10:03 am

    Beautiful!!ReplyCancel

  • Larrik (??????)September 29, 2011 - 10:26 am

    ?????? ???? ?????? ??????????? ? ???????? ????????????? !
    ? ??? ???????? -?? ?????????? ! ?????????? , ???????? ,??????? ????????? …??????? !!ReplyCancel

  • FrancineSeptember 29, 2011 - 10:28 am

    Yesterday i work hard for try to figure which spellbinder make a nice combine. Do you have a chart because actually I don’t know where to start. I am doing some statistic and it appear you have so many shapes and I just don’t know what is the basic and what is the best options… I have so much to learn and your site is full of teaching. Merci beaucoup la carte d’aujourd’hui est superbe. FrancineReplyCancel

  • Pam HSeptember 29, 2011 - 10:32 am

    We love hearing from you too Becca! You are such and inspiration and it is so much fun to open your site. I love this card! I think it is one of my favorites. Love the medalion look. Too Cool!ReplyCancel

  • JulieSeptember 29, 2011 - 10:44 am

    Becca,

    This is gorgeous! You are a woman after my own heart! …JulieReplyCancel

  • Nancy SchultzSeptember 29, 2011 - 11:08 am

    Beautiful card Becca! I love what you do with Spellbinder dies and Justrite stamps!ReplyCancel

  • BetsySeptember 29, 2011 - 11:32 am

    I LOVE this card, Becca! It is just absolutely gorgeous!!!ReplyCancel

  • Patsy EcclesSeptember 29, 2011 - 11:54 am

    Please don’t ever stop making cards and other projects. The joy your work brings to me and others and that is just in looking at your blog every day. Youmak all these tools look new again! Thank you.ReplyCancel

  • Carol LSeptember 29, 2011 - 12:20 pm

    Please make the instructional video on the pop-up snowflake red and white card you made last year. After lots of people asked for it, you said you would do it.
    Thank you.ReplyCancel

  • Angela FehrSeptember 29, 2011 - 12:33 pm

    This is a beautiful card. I love the simple flourishes of the fleur de lis die and the lovely soft colours.ReplyCancel

  • DeniceSeptember 29, 2011 - 1:59 pm

    My goodness, gracious, this is so beautiful. If I had one tenth of your talant, I would be a happy gal. I hope all is going well with you and your family. God bless, Becca. Hugs, DeniceReplyCancel

  • JoAnn B.September 29, 2011 - 2:09 pm

    Wow, this is gorgeous. Love the embossed white designs on the pink and the way your card opens. Thanks for sharing your creative talents.ReplyCancel

  • Shari B.September 29, 2011 - 2:17 pm

    Your card is just beautiful. I love your attention to detail!ReplyCancel

  • MaryannSeptember 29, 2011 - 2:25 pm

    Oh you´ve just used the stamp here, that I just had put on top of my wishlist here ha ha ha. It´s soooo gorgeous, but they all are thoug, Your card is so wonderful dear friend and I just loves everything about it today. Just LOVE it.ReplyCancel

  • PeggySSeptember 29, 2011 - 2:30 pm

    Love it top to bottom, side to side and inside out. Great job!
    God bless,
    PeggyReplyCancel

  • SusanSeptember 29, 2011 - 2:32 pm

    Oooh! I absolutely love this card Becca — simply gorgeous!ReplyCancel

  • Iris FrankSeptember 29, 2011 - 2:37 pm

    Wowza!ReplyCancel

  • Carol E BrookerSeptember 29, 2011 - 3:11 pm

    What a beautiful card, love the sweet look it has, thank you so much for sharing it.ReplyCancel

  • Allison PhillipsSeptember 29, 2011 - 3:13 pm

    Oh wow! What a really lovely card! I love
    the soft dreamy colors and you did a wonderful layering
    job on the whole card.
    Kudos to you!
    AllisonReplyCancel

  • Pam BlairSeptember 29, 2011 - 3:20 pm

    Stunning, Stunning, and more stunningly gorgeous is the only words I know to describe your card Becca. I wish I half the creative talent you have. Absolutely love, love, love that card. Thanks for always sharing your beautiful card designs with us.ReplyCancel

  • lois skiathitisSeptember 29, 2011 - 4:10 pm

    This is a beautiful shabby-chic card Becca. Love the layers and the stick pin and the all over look. As they say pretty in pink. Beautiful work. As always Becca, TFS!!! :-DReplyCancel

  • Carolyn G.September 29, 2011 - 5:53 pm

    Oh, Becca! Beautiful!! Love the colors, the antique look, the fold….the whole card. Just beautiful!ReplyCancel

  • Terri SSeptember 29, 2011 - 6:25 pm

    This card just takes my breath away!ReplyCancel

  • Becky GreenSeptember 29, 2011 - 7:33 pm

    WOW Becca!!!!!!!!!!! ANY “FRIEND” would LOVE to receive this card!!!!!!! IT’S GORGEOUS!!!!!!!!!!!!!!!!!!!!!!!!!!!! :) ( I have a weakness for doilies!!!!!!!! )ReplyCancel

  • RufusSeptember 29, 2011 - 8:15 pm

    Another gorgeous card, Becca! Hope that all is well with you and yours
    R/ReplyCancel

  • KathySeptember 29, 2011 - 8:22 pm

    Your card is awesome! Just love the lace stamp!ReplyCancel

  • Robin GasserSeptember 29, 2011 - 9:31 pm

    Wonderful look of lace on your card! Thanks for sharing your ideas.ReplyCancel

  • donna wannellSeptember 29, 2011 - 9:59 pm

    hard to think of a comment worthy, WOW will have to do!
    love it , love it!ReplyCancel

  • Debbie EbatSeptember 29, 2011 - 10:42 pm

    love this card… what die cut did you use with the border stamps… which I love but I need to know if you hand cut or what die cut to use..
    thanks
    DebbieReplyCancel

  • BernieSeptember 30, 2011 - 12:30 am

    This is spectacular! The layering and colors are brilliant as usual. I really love the new JR lacy borders and doilies.
    Blessings BernieReplyCancel

  • Barb GhigliottySeptember 30, 2011 - 1:16 am

    Hi there Becca,
    I’m sorry that I haven’t stopped by lately….I really LOVE your card! Thanks so much for inspiring us all the time…
    Off to catch up on your latest posts :-)ReplyCancel

  • MarjoleinSeptember 30, 2011 - 4:25 am

    Hi Becca, I love your card and the new just rite stamps. The are gorgeous.
    Can’t wait to order them. I follow your blog for so long now and every time i’m amazed by your beautiful cards (hope it’s good english, lol)
    Love from Holland, MarjoleinReplyCancel

  • dianne davisSeptember 30, 2011 - 7:16 am

    Your card is gorgeous!!! I’m not a pink person-but I could be now! TFSReplyCancel

  • kendellSeptember 30, 2011 - 8:25 am

    Your card is just awesome. Thanks for sharing your projects, they are really appreciated. Kindest regardsReplyCancel

  • Larrik (??????)September 30, 2011 - 12:25 pm

    It is simply stunning!!wonderful card!ReplyCancel

  • lori fiorelliSeptember 30, 2011 - 8:38 pm

    im going to upgrade my i phonr to#4 so i can zone in on all your designs. this card is beautiful ,my new stamp should be here mid week. i love copics and this stamp will look gresat.thanks loriReplyCancel

  • JalineSeptember 30, 2011 - 10:24 pm

    It is beautiful. The colors are wonderful.ReplyCancel

  • EileenOctober 3, 2011 - 6:16 am

    what a beautiful stamp and nesties. you do such wonderful work with them.

    LOL EileenReplyCancel

  • Margaret AndersenOctober 3, 2011 - 7:37 am

    Hello Becca

    I have just come across some of your wonderful cards and they are really fantastic.

    I have also watched your video on how to make the butterfly card. Would you be able to tell me where I could buy the Jumbe Scallop Punch in Australia (or in the US if it is unavailable in OZ).

    I will keep coming back to your site over and over. You have really inspired me.

    Many thanks and kind regards

    MargaretReplyCancel

  • AnneOctober 5, 2011 - 2:33 am

    Love this card! But then – I always love your cards, Becca :o)
    Hugs
    Anne (UK) xReplyCancel

I N F O