
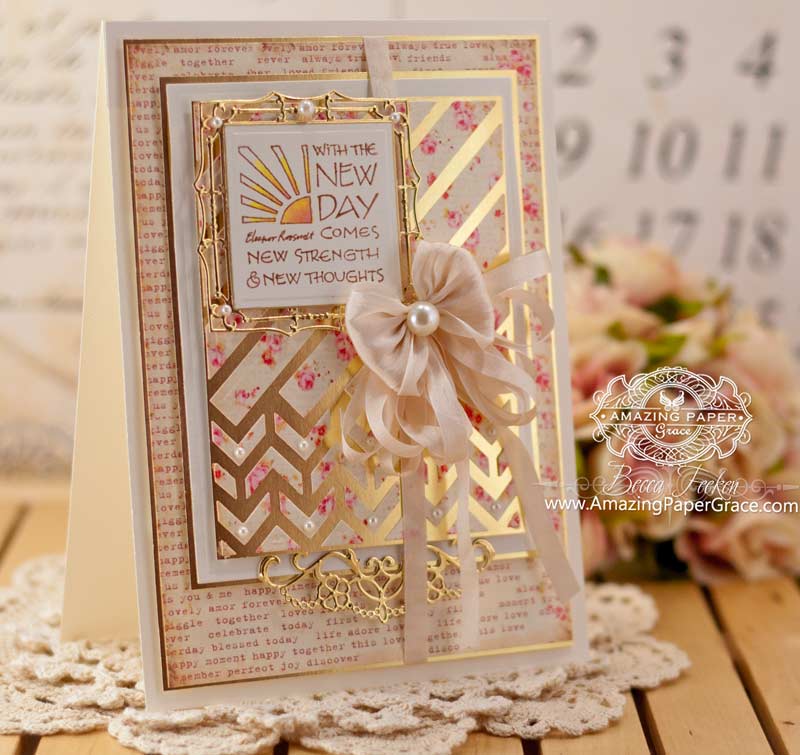

Hi there friends! As always, I’m working on stuff in the background but took a moment have a look at what’s new in my stash. I was so inspired by this Wordsworth sentiment I’ve had on hand and it reminded me of the new Spellbinders Diagonal Chevron I had laying on the table. It’s very contemporary but in cardmaking I feel strongly that there are no rules – go where ever your heart takes you! I thought that this template was a great opportunity to show some design paper so I cut the die template, flipped it over, placed Glossy Accents on the the back of the pieces that would normally fall out but then laid a piece of gold paper on top and let it dry. Once dry, I took off the die template then removed the diecut and the leftover pieces stayed glued to the gold paper. The small sentiment is popped up on Spellbinders Labels 42 – Decorative Accents and Spellbinders Classic Squares LG.
See my tiny bows? Yep, I didn’t want to cover up too much of that pretty background :-) I embellished the bottom of the card with Spellbinders Corners and Accents One.
Here’s how I made it – step by step:
- Create a card base with cream card stock that measures 5-1/2″ x 7-1/2″. (Card base is made with two pieces of 5-1/2″ x 8-1/2″‘ paper scored and glued as in this Hinge Video.)
- With print paper, cut a panel 5″ x 6-7/8″ and mat it with a gold panel cut to 5-1/8″ x 7″. Adhere with print paper on top.
- With cream paper cut emboss outside border from Diagonal Chevron and mat it with a gold panel cut to 4-3/8″ x 5-5/8″. Adhere to previous layer with foam tape.
- With floral design paper cut/emboss Diagonal Chevron, flip die template over so back is face up and place Glossy Accents on the fall out die pieces. Cover with a gold panel cut to 3-7/8″ x 5-1/8″ pull off main die cut and fall out pieces should remain glued down to gold paper. Adhere to previous layer with foam tape.
- Wrap ribbon and lace vertically on right side of card, taping on back. Adhere grouping to card base.
- Cut/emboss Labels 42 – Decorative Accents and adhere to upper left corner using foam tape.
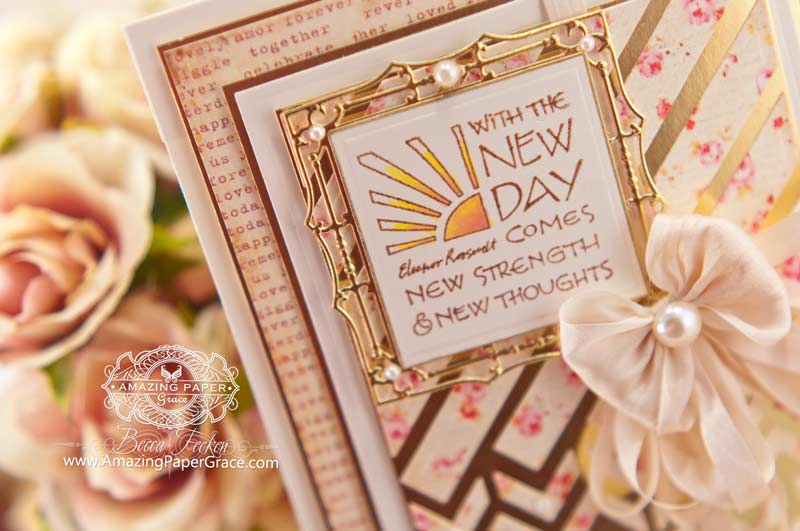
- Stamp sentiment on cream paper then cut/emboss with Classic Squares LG #4, rim with gold Krylon pen. Adhere square directly to Labels 42 – Decorative Accents
- Cut/emboss Corners and Accents One and adhere to bottom of card
- Attach bow, add Pearls.
| CRAFT SUPPLIES I USED |
| Rubber Stamps: Wordsworth Stamps – Life Affirming Craft Paper: Neenah Classic Crest – Natural White – 80lb Smooth, Gold Paper, Printed Design Paper from Iralamija’s Etsy Shop Ink: Versafine Vintage Sepia Accessories: Spellbinders Diagonal Chevron, Spellbinders Labels 42 – Decorative Accents, Spellbinders Classic Squares LG, Spellbinders Corners and Accents One, The Paper Studio Pearls, May Arts Silk Ribbon |
I’m listening to a circa 2008 Oprah rerun and they are talking about ‘schlumpadinkas’ (google it). Oh emmm geee – that’s me, it’s just a schlumpadinka day – it’s raining and I’m sure sitting here in my sweats! Come on sun, time for me to get outside and walk :-)
Parking Lot Questions:


Beautiful! I especially like the gold accents!
ALWAYS LOVELY BECCA!!!!! :) None do it better than YOU! :D
Elegant card with beautiful detail. Where do you purchase your gold paper? Will make but substitute with s Sue Wilson die. thank you for the wonderful tutorial.
One word BEAUTIFUL!!!!!!
Loving your card, the detail and layers , just beautiful as always Becca.
God Bless.
Elaine H X
Ooooh … gorgeous gold diecuts and accents on this beautiful card, Becca!
This is really a very striking card . . . very bright and gay . . . and out of the ordinary! But beautiful, exquisite . . . and FUN!! It took me a couple of read-throughs to understand that you set the die cut cut-outs atop the gold, but now that I get it, it all makes sense, looks lovely and is pure genius! Thanks for sharing all your lovely creations – we appreciate every one!
I love your work where do you get your ribbon
I must be a very visual person, I really can’t figure out how you did the cut-out pieces, any chance of a quick video tutorial in the near future? The card is amazing as always, I love everything you do. Thanks.
Such a flexible design. Thanks for you inspiration! I am finally getting comfortable leveraging your designs and adding changes to make my own twist (rather than exactly copying your designs). Thanks for helping me increase my confidence!
Might be contemporary – but everything you do still has a very classic look to it. This is gorgeous!
Hi Linda. To help identify which pieces are used from each die set you may want to click on each link (Spellbinder die name link) that is provided. When the link opens to a new page with a picture of the set, then I can see the piece that is used in the card. Also, I can see hoe that die piece is used on the card such as, which layer. Hope this helps. Best regards, a fellow Becca’s fan.
Becca,
Oh my gosh, what an amazing card. Love everthing about it. Thank you for the tip, I will have to give that a go. Question: Do you find that Glossy Accents works best on foil paper, or do you use another adhesive for slick surfaces?
The New Day New Strength card looks like the dies are Rectangles and not Squares.
So lovely….and the sentiment is beautiful as well.
wow Becca, another stunning card. I love that bow..
So lovely.
Beautiful Becca, love the card and the pretty papers. I love your bows they always look fabulous no matter what size they are.
Love & Hugs
Jacquie J xxx
Morning Becca, Another gorgeous creation, as always your cards are so elegant.
Lots of love from Patricia xx
Great card and love that mini bow – soo cute – never heard the word schlumpadinka – I did look it up – think we use the word chav here – it reminds me that there was a funny comedy sketch done by Harry Enfield some years ago now called Wayne and Wynetta – known as The Slobs I think- was really funny – if you get a mo and fancy a laugh it might be worth googling. I think we all have comfy clothes that we would not be seen dead out of our own house in – I know I have – so you are not alone and I have fessed up also! Thanks for sharing –
Hello Becca
Thanks for showing the new Dies……. I have started a list of the ones I like, so when they are available here….. who knows ? I may get them for Christmas! lol !
Lovely colours Becca! the Angular shape of the Die will have to grow on me I think…you have made it look lovely though!
Take care
Love Marg
Hi Becca. A gorgeous card, I love the delicate dies that you have used. Take care.
Absolut stunning card here again Becca. I love your use of gold, and wish I could make mine to look this elegant too, but they just never do for some reason.
Good Morning Becca!!! Can you tell me what kind of gold paper you use and where I could buy it? Is it Cardstock or Paper? Thanks and have a blessed day!!
Lisette Marquez
Beautiful card! Do you still sell your bow maker? I’ve been trying to send you a msg via the “Contact” button from above but Captcha doesn’t seem to be working properly.
You are just so brilliant, Becca. This is just a fabulous card! I love the way you see the components and design a work of art. Just beautiful!!
Amazing use of negative space…so just to confirm, the backside of the floral designer paper is showing through the gold, correct? Also, i’ll second the video tutorial request! :-)
This card is stunning! Please share the name of the gold paper you used for the small frame around the quote. It appears to shiny and has to be very sturdy to be cut well by that delicate die.
GORGEOUS card!
Super card Becca , love that dinky bow!
XxRuth
Where do you get your e
Ribbon
The quote is wonderful and I so love how you framed it. Interesting chevron die. You sure made it pretty!
Beautiful gold accenting, really highlights the wonderful dies!
Love the stamp and the gold accents on the card. REally beautiful!
Hugs
Anne (UK) x
I regularly make sets of thank you, get well and thinking of you cards for our minister as she loves sending out cards. As an “international” guest, I would love more word dies. Thanks for your beautiful creations.
a small black pad used for molding flowers, I called the company and said it works great for molding, but they were losing out, as it excelled for a mat under your cardstock for a perfect stamped image!
I am a die cut junkier….I have mostly spellbinders and would love any of there dies……can never have enough….. thanks for the chance to win some goodies….how do you store your large spellbinder dies?
I love your work fantastic
I save the containers from Crystal Light instant tea to put cut out sentiments in them. I can make multiples at one time and store for later.
I would love to own a new sillouette die cut machine.
Love the fresh modern look of this card.
My dreams: shelving and someone to help put it up – and time to actually sit down and organize my heart out so that I can create with the joy and peace that comes with a calm, organized place.