
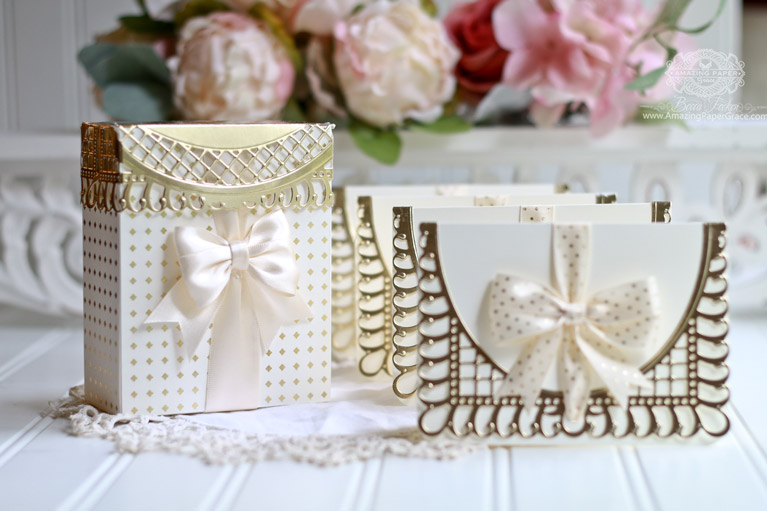

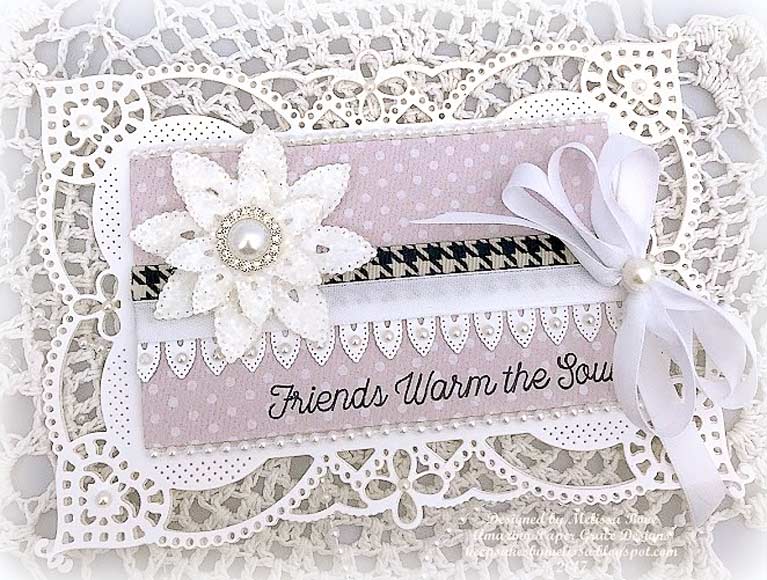
Hi there sweet peeps! I had a lovely Christmas with my daughter and have another day or two with her before she returns. I thought this would be a great time to show a project I made earlier that I haven’t shared here as well as some lovely inspiration from the Creative Team. The project is a Gift Box and Card Ensemble using a folded Bella Rose Lattice Layering Frame. I love using large templates and figuring out the ratio to turn them into boxes. For this project I also used the Lunette Arched Borders set and specifically the lattice design from that set. The cards are 3-1/2″ x 5″ each.
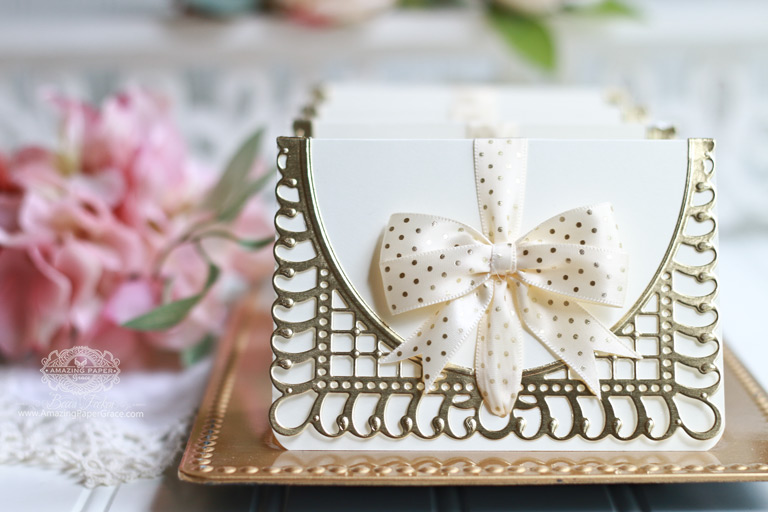
Putting Together the Gift Box Notecards:
1. Cut small card 7″ tall by 5″ wide; score in half to make a 3-1/2″ x 5″ landscape card, round corners on bottom two corners.
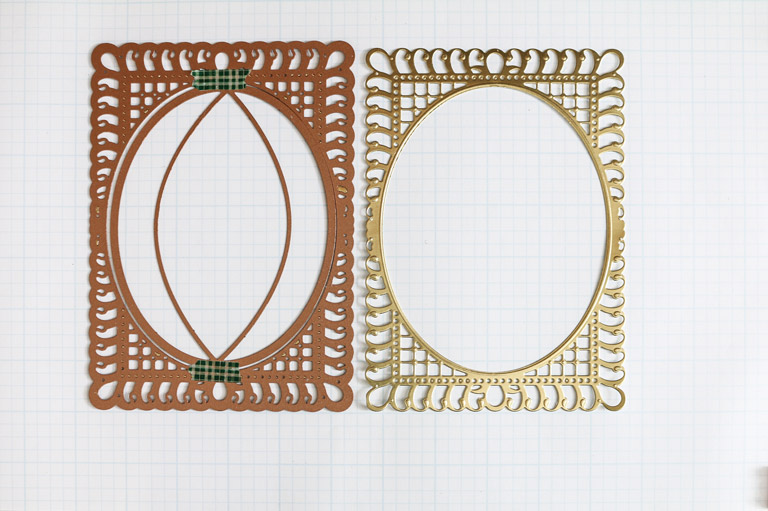
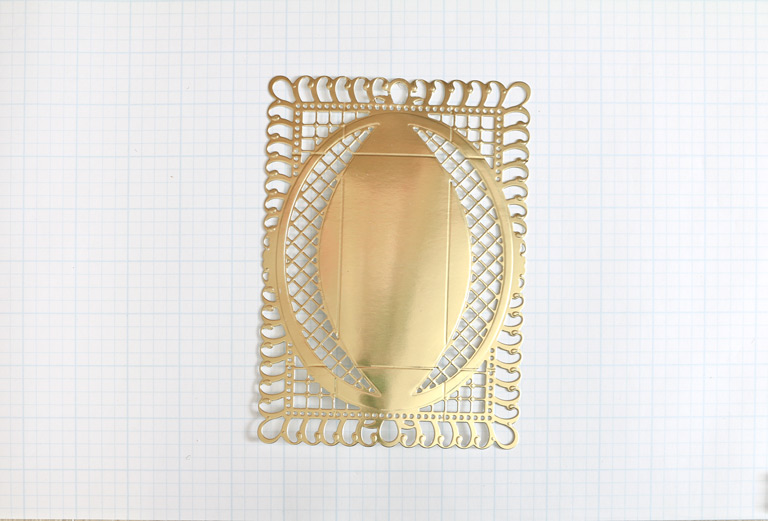
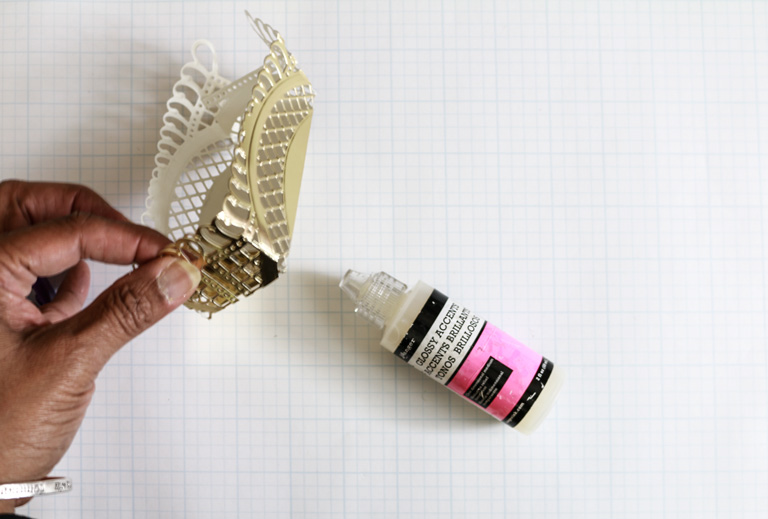
2. Cut/emboss Bella Rose Lattice Layering Die including the large oval die.
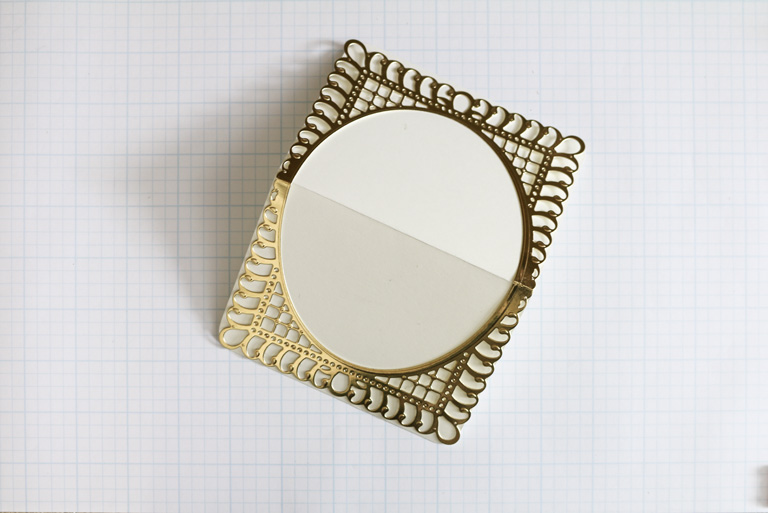
3. Hand fold the Bella Rose die cut in half and glue to card base.
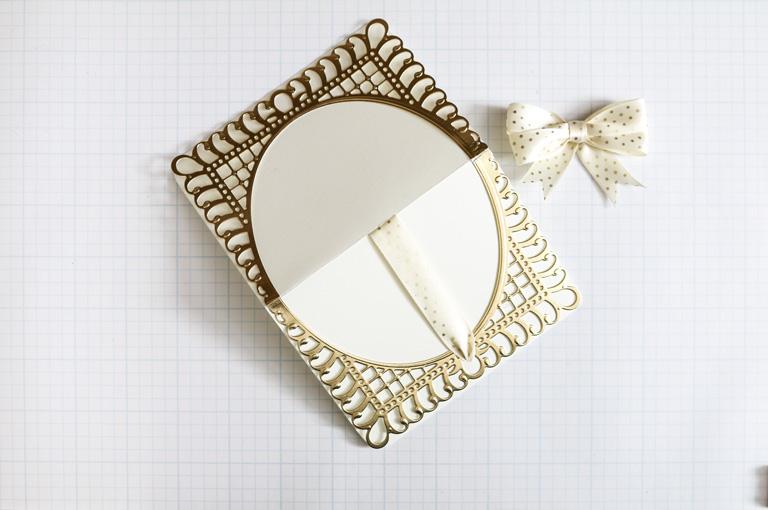
4. Make a 1″ slit along the middle of the fold card base at the fold line. Then punch a hole in the large loop on the bottom of the card and thread ribbon up through hole and down through slit. Secure ribbon with tape. Add a pre-tied bow to ribbon at bottom, center of card.
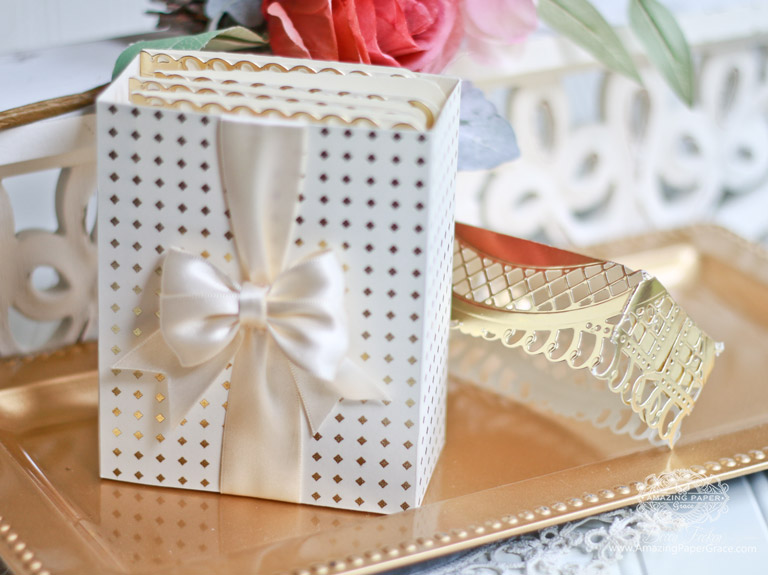
Assembling the Gift Box Bottom:
1. Cut two pieces of sturdy card stock to 6-1/2″ x 7-1/2″

2. With the 6-1/2″ edge at the top of a scoreboard, score at 4″ and 6″ then with the 7-1/2″ edge at the top of a scoreboard, score at 5″ and 7″
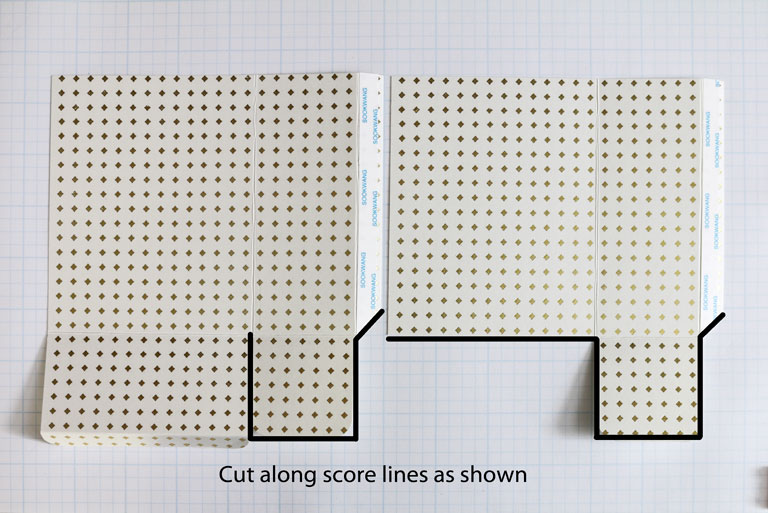
3. Cut as shown, round corners and add ScorTape to right side flaps.
4. Remove tape liners and lift right piece onto left flap to make one piece. Fold right flap under then fold entire piece in center (wrong sides together) to engage the remaining flap. Pop up box from flat to dimensional and close bottom tabs.
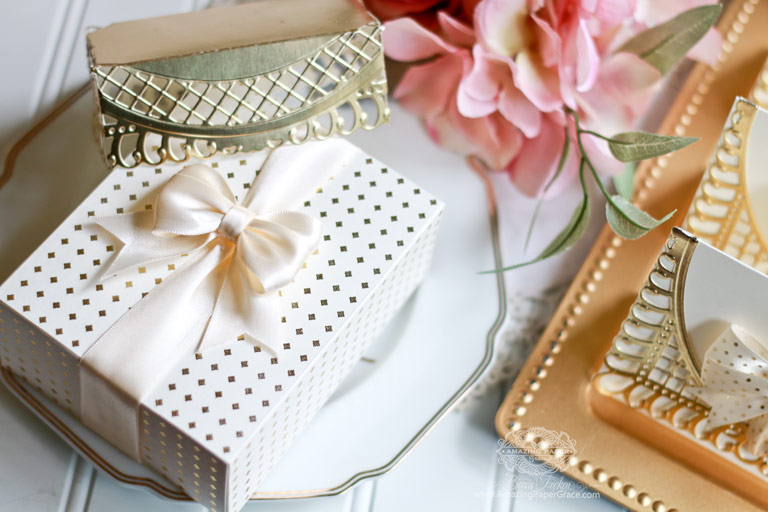
Constructing the Gift Box Top:
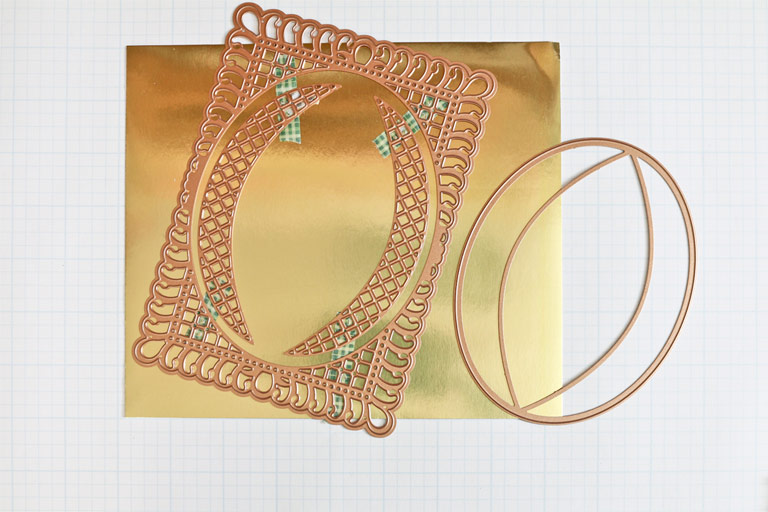
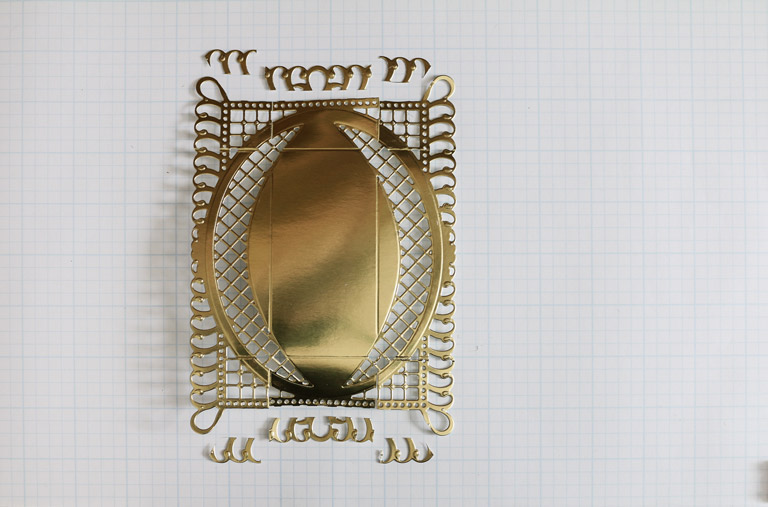
1. Cut/emboss Bella Rose Lattice Layering Die, excluding the large oval die but including the arched inserts from Lunette Borders.
Tip: Placing the arched pieces is easy if you use the large oval as a guide but then remove so as to not cut out the oval.
2. Score 1-1/2″ from each edge turning 90 degrees for each score and as a result, that will give you a total of four score lines.
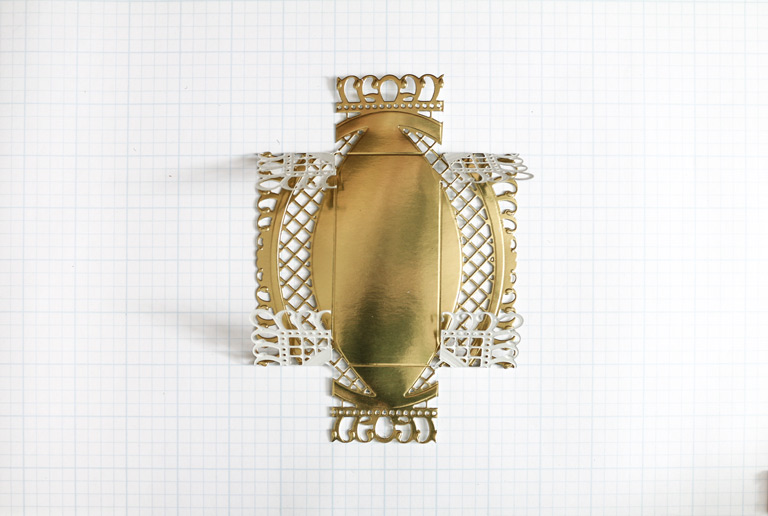
3. Cut as shown above.
4. Trim loops from each end as shown above.
5. Flex all score lines, bend flaps around end of top and glue sparingly.
The project is not hard at all but I do recommend practicing the top with scrap card stock before making the final top. I do this with all the models I work with and it makes it stress free :-)

Stamps: None
Paper: Neenah Classic Crest – Natural White – 80lb card stock, Gold Poster Board – Fine Touch – Hobby Lobby
Ink: None
Accessories: Amazing Paper Grace Dies, Bella Rose Lattice Layering Frame, Lunette Arched Borders, Offray Ribbon
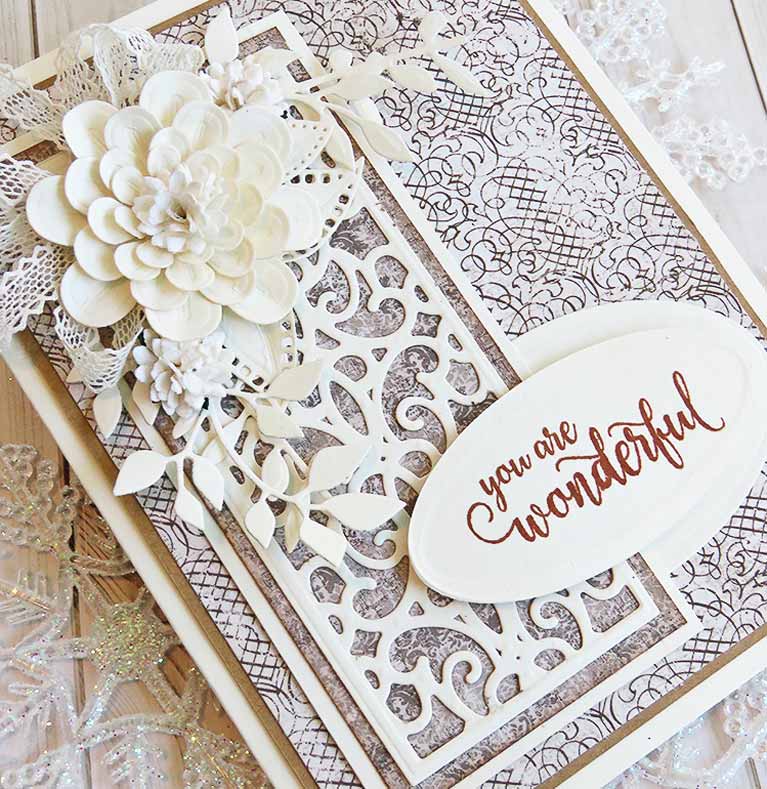
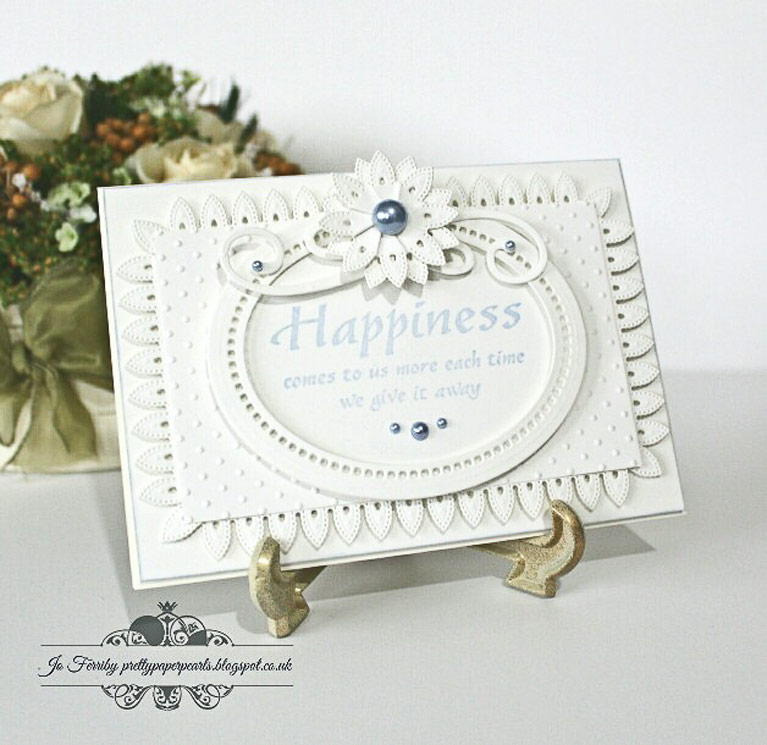
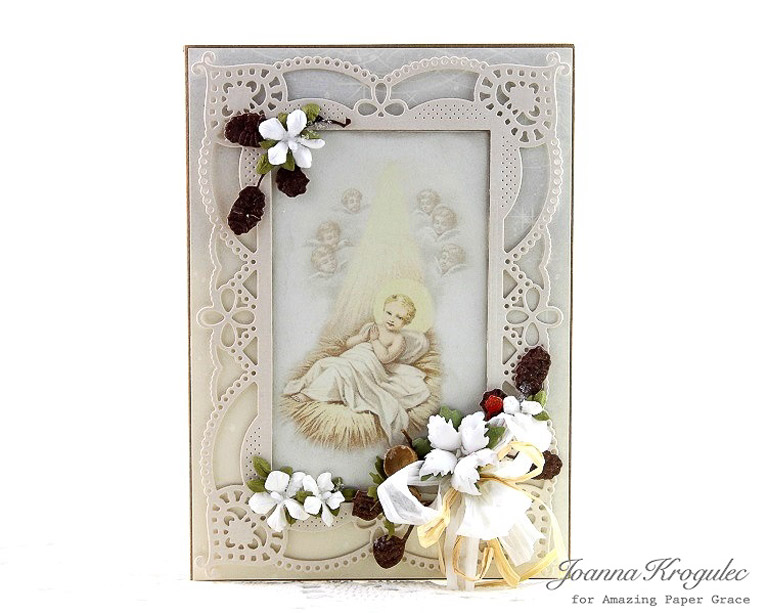
The samples made by the creative team over Christmas were stunning! They used more dies from the Chantilly Paper Lace Collection and I hope you’ll scroll through.
Hey, don’t forget to share what you make on Instagram or Facebook if you live there. I’m so tickled when you all tag me to show you’ve created something or remade one of my cards to send to a loved one. I love instagram because it’s on my phone and I take it everywhere. If you’re a hold out and want to learn how to get started, let me know if your comments. I’m considering doing a series of posts :-)


So glad you have had this time with your daughter. You are blessed. Love your box and matching cards. Great instructions. Thank you. Even I think I could following these instructions.
Beautiful card box and cards. Can’t wait to see what you and your team will do in 2018. Always enjoy reading your posts. Thank you for sharing.
Your box is stunning and the design team did an excellent job on all of their projects.
Becca, what a charming box with stationary!!! And thank you for the easy-to-follow instructions. What a beautiful idea! And thank you to your team for their beautiful submissions as well.
Hi Becca. Lovely item as usual. You do the most amazing things with shapes, cuts and folds.That’s what caught my eye first time I saw something you created (the punched geometric folds for flowers or medallions). Anyway, yes, I would love instructions on using Instagram. I am not really a hold out, just old (lol) and learning isn’t as easy as it once was, so learning from you in your calm voice and manner would be so helpful. Thanks for asking. :-)
Hope that you are enjoying your holiday with your daughter. The Lattice Gift Box Ensemble is stunning in white and gold. I love this die set and use it often but have never thought to use it this way. I’m going to have to give it a try.
All of your posts are so beautiful, elegant, and just ‘me’. Congrats to all the Designers. Thanks
Becca love that you have had a lovely Christmas with your Daughter
wish I had a daughter……..
Thanks for sharing today did not expect it but very happy you did
hope you enjoy the time left before your Daughter goes home !!!!!!!!
Love the weekly inspiration Hugs Pam XXXX Daughters HUG X
Hi Becca,
Just wanted to say a Belated Merry Christmas to you & the team. I have been quite on here as I have been busy with life lol but I have been having a quick peek & your projects have been gorgeous!
Wishing you all the best for the new year!
x
I just love, LOVE, LOVE your work! You are Amazing. Your bows add such beauty to your work. Do you have a tutorial for your bow making skills? If not could you please, PLEASE create one for us?
Thanks for sharing your creative and brilliant ideas!
Stunning, stunning, stunning!!
Doreen R
Gorgeous box and cards!
Thanks for adding a tutorial, so it is possible to have a go ourselves :))
This set is beautiful.
Absolutely stunning creations ladies! We need more retailers in the UK who stock these dies! Thank you for sharing :) x
Hi Becca! WONDERFUL CREATION!!!! I LOOOVE ALL of the GOLD! Joanna reminded me to come over & comment, as I saw her over at SCS…. We have been down with the flu over Christmas, so that is why I am late in coming over. We’re on the mend now. LOL But, I DEFINITELY wanted to come over to comment on your GORGEOUS CREATION!!! I need to get back to creating soon, Thank you cards….. Your cards would be PERFECT for this! ;)