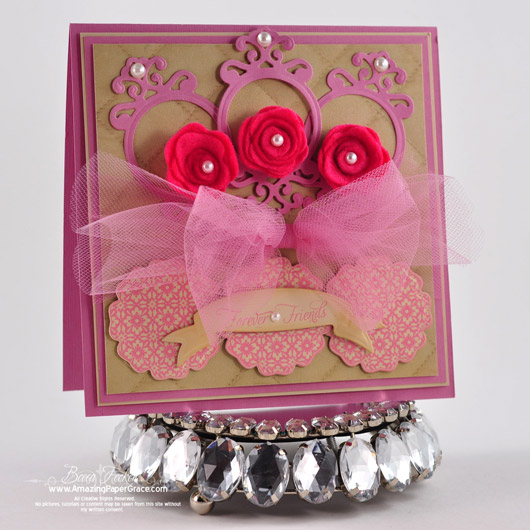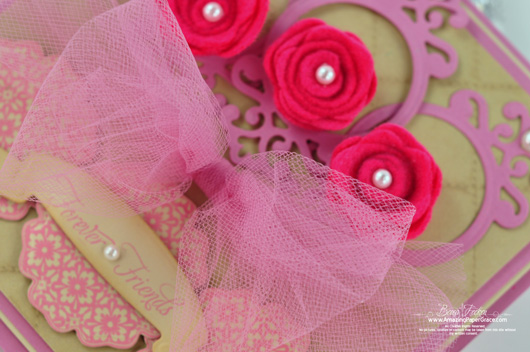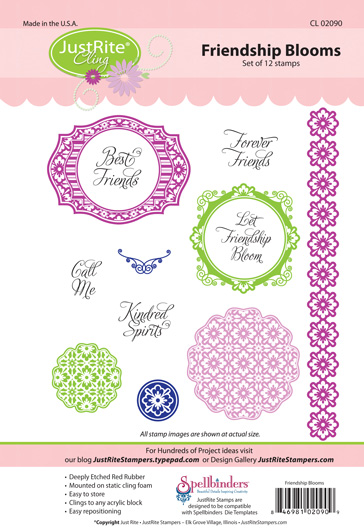
Hi there. It’s busy times in stampland because of all the wonderful releases!! This is my second card today and again I’m thrilled to show stamps that match the new dies that Spellbinders is currently releasing!! The set that I’m sharing today from JustRite Stampers is called Friendship Blooms and it’s the newest offering of the JustRite Cling collection of stamps. I’ve wanted for so long to dabble in those dimensional roses and I knew that Spellbinders Blossoms Three would handle the job and boy howdy did it! I have all the Spellbinders Blossom sets and little did I know that to get this rolled flower all you have to do is cut a spiral and roll it up!! How cute and delicate are they? I highlighted them by framing each with one of my favorite pieces from Spellbinders Parisian Accents (lol, I have feeling you’ll see this piece a lot).

I used my cut outs of the flower to build a border along the bottom of my card. I simply stamped then centered my die template over the filigree pattern and cut; now I have a beautifully patterned die cut in the ink to match the rest of my card. To top of off I added the sentiment on another of my new favorites called Spellbinders Ribbon Banners.

Just as a matter of note, the new JustRite Cling stamps that match Spellbinders die templates are also designed to work with all previous JustRite Releases in the ribbed collection. In other words, your other centers will fit in the centers of these sets!!
| SUPPLIES I USED |
|
Stamps: JustRite Stampers – Friendship Blooms |
Before I share my tutorial, here are the other JustRite Designers that are have goodies to show you with the new Friendship Blossoms set.
Becca Feeken (Thanks for stopping by!!)
Stephanie Kraft
Heidi Blankenship
Kellie Fortin
Thanks so much for stopping by today. I’ll be back soon with more goodies!


This is beautiful Becca. Looks like you have had your plate full the last couple weeks. You have made some wonderful projects. I love the colors you chose and these JR stamps are stunning. :)
Hugs~
So nice and sweet!
Gorgeous! Thanks so much for the tutorial–I think I just might be able to do that!
Sigh … I’m jealous! I want to play with Parisian Accents too! :-) Another gorgeous creation, Becca!
WOW!!!!! Becca, sigh, you keep showing us all these WONDERFUL things!!!!! ( And I’m on a “spending freeze!” :( ) I’m going to HAVE TO write all these things down somewhere safe!!!!! I LOVE ALL the new things you’re showing us!!!! THANK YOU!!!! :)
Wonderful tutorial. The other day I made a card and wished I had a banner stamp or – even better – a banner die cut that I could use just the way you did today! How awesome to see these coming to market.
that’s interesting that you roll them from the opposite direction. Most people start the roll from the outside edge and roll into the middle using the centre circle as the tab you glue onto the bottom.
SWEET! luv your bows ‘n flowers…
Just love the new stamp sets and dies. This is beautiful.
Your card is very pretty. Just-Rite really is coming out with some pretty stamps. I so appreciate that the companies items can be used together. Thanks for the tutorial Becca, I always love hearing about how things are made. As always Becca, TFS!!! :-D
fun, fun, fun!
Sandra ltb
I tried doing your rolled flower tip and I did it first time!! You are awesome and I appreciate you saying what your accessories are and instructions that you make your gorgeous cards. I’m sticking with you and maybe I can make gorgeous cards too.
Another amazing card – I just can’t stop looking at it. I could only dream that mine would turn out as stunning as this. Definately eye candy for the crafter!!!
Paula, Derbyshire, UK. x x x
Thank you for showing how you rolled the flower up. Using a glue dot should help keep it tight enough and in place while rolling. Lovely card with those flowers. TFS!
Thanks for all the recent tutorials, you are truely inspiring Becca
I just saw flowers similar to these in a recent Archivers e-mail I received the other day. They were in kits by one of the crafting supply companies and were pre-cut into spiral shapes to be rolled. When I saw them I wondered if they would look right if I cut my Spellbinder die cuts with a spiral shape and rolled them. The only difference would be that the pre-cut ones have the decorative edge on the entire spiral cut edge. Thanks so much for sharing how they look by just using the Spellbinder dies. They look great and will be much less expensive!! I already own Blossom 1 and 2 and Dahlia and Peony and just saw a preview of Blossom 3 and can’t wait to get that one, too! It will be fun experimenting with the flower dies I already own to see how this kind of flower turns out. Your card is so gorgeous!!
Oh my goodness, how beautiful!!
Beautiful flowers. Thank you for the tutorial. I’ve gotta give this a try!
You were right, these flowers are so easy and look so fun! I love the new stamp sets. It is going to be difficult to decide just what to order first! Your card is so pretty, I love the colors!
Love your flowers. Thanks for the tutorial Becca. Hugs Evie (Singapore)
Oh I adore these type of flowers and you’ve inspired me to try them with some of my flower dies…thanks Becca! xL
Cute roses!
Thanks for sharing the tutorials! :o)
pretty, love your flowers, thanks for the tips!
Love everything you do! You were the first stamping blog I ever put on my favorites. I check you out 2 or 3 times a week and am never disappointed, Such inspiration!
A beautiful card, Becca, and, oh, how wonderfully simple those flowers are! Thank you so much for sharing the tutorial!
I never thought about putting a sticky dot on my stylus. Great Idea. Love the colors. Pink is one of my favorites
Another beautiful card. Love the colors you used!!
I love how you show set by set how to make the little flowers. Thank you so much I like your card.
Just found your blog through Spellbinders, and I immediately subscribed! Love your work. I can’t wait to go back through some of your older posts and tutorials.
Thanks for the spiral flower tutorial. I just got a flower nestabilities in Dec. so I will be trying that too!
WOW, Thanks becca for the little flower tutorial, i cant wait to make some.
what a beautiful card as always and thanks for the tute on your flowers- so cute – love these new cling stamp designs thanks for sharing
This is beautiful. Love the rolled flowers.
What a pretty card. I love those pretty little felt flowers. I make roses out of paper but have never cut felt. Does any felt work with the spellbinders or do you buy your felt somewhere special?
This is the best flower tutorial I have seen and love your blog as well. Beautiful card!! :)
Hi Becca,
Beautiful card, and I love the tutorial. Many thanks x
[…] […]
[…] […]
Becca,
I love the figure 8 bow, I think I might be able to use that one a lot!! Thanks for sharing, I love that you do video tutorials, I think I am a visual person, I can get things so much easier if I see it done than by reading it, faster too.
I checked out Michele Kovack’s site today as my share the comment wealth, she is offering blog candy so I tried at a chance for it too. I just love this idea, I have seen so many artful things and found so many new sites!!
Thanks again, ~Ginny K.~