


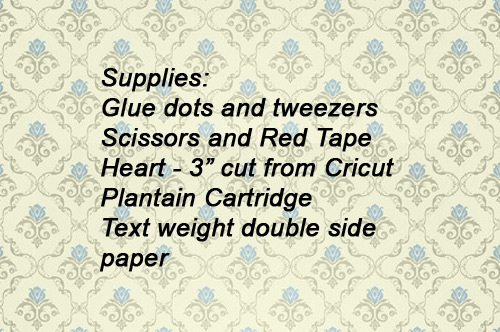
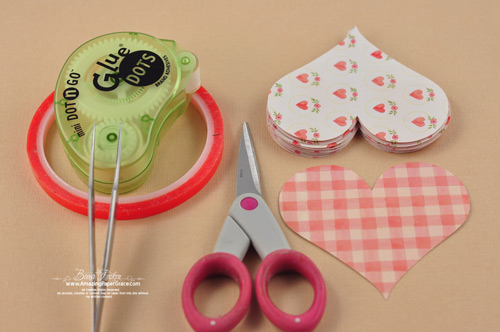
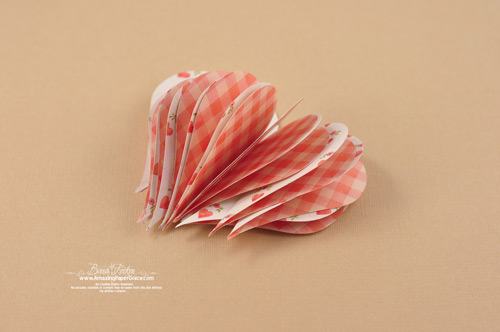
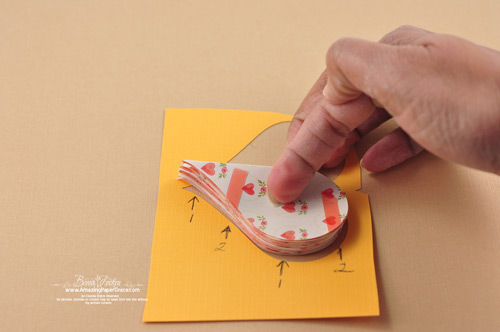
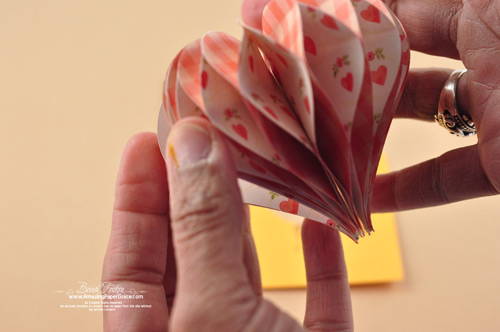
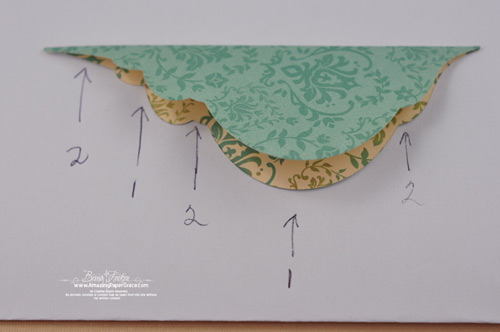
Hi there!! You asked for it, you got it!! Here is the Honeycomb Ornament Tutorial. Since we are past Christmas, I made up another ornament using a heart shape that I cut on my Cricut. It all goes together very easily. The most important thing to keep in mind is that you need text weight, double sided paper – the thinner, the better! Cardstock is too heavy and doesn’t allow the gussets to give. Please make a trial one first before using your “good” paper. Try the technique and experiment with different types of glue dots, some are too weak to hold and will release in a day or so others are more aggressive. Trial and error is the key. Good luck!!


Want to check out the Spellbinders Heirloom Ornament I made with the same technique? You can see it HERE. Oh the possibilities!!! You should be able to do this easily with any symmetrical shape and with effort it can be done with other shapes. Have fun with it and feel free to link your creations back to this post. Thanks!!
Don’t forget, I have double play blog candy going on right now. Click HERE to go to the post to leave a comment to enter.


You are such a sweetie Becca! Thank you so much for this tutorial. I love how the heart turned out, really adorable.
Elaine Allen
thanks for taking the time to put this together Becca! Both projects are gorgeous and I definitely intend to try to make some!
Wow – another fantastic tutorial Becca – you are so creative, thank you for sharing with us.
i have been wanting to learn how to do that and what an easy to follow tutorial!!. i really love your new look. the heart is gorgeous!!
Thank you for the great detail in your ornament. I love the heart shape which will be great to display during the month of February. Thanks again.
[…] […]
This is a great ornanment. You are so creative and make the most beautiful things.
Wonderful tutorial Becca, thanks.
Wow…I just love it…OH the possibilities!!
I wished it worked with the Spellbinders Heart..as I don’t own a Circuit. But it is lovely!
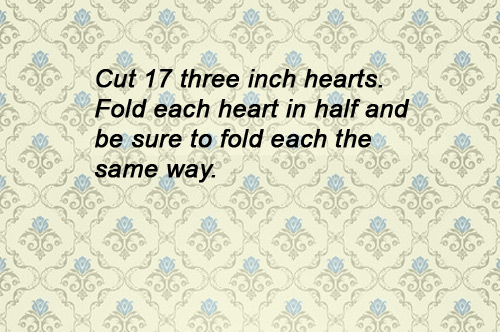
Thanks for the tutorial…is there an extra word in the text instructions….i.e. cut 17 THREE hearts? I presume so……
Cyndi….I only have Cuttlebug and Spellbinders heart…I don’t see why it shouldn’t work with it.
Becca; genious in your enginerring ability!! Thanks for sharing your work and designs and inspiring us to look beyond the obvious! Wishing you a wonderful day full of inspiration and joy… hugs, k
Yayyyy!!! I couldn’t wait for you to post the tutorial on this. As soon as I finish my “have- to- do’s” around the house today, I will be in my craftroom trying this out. Thank you so much.
That is gorgeous. Have a good day.
Oh, Thank U Becca for the- Oh, so easy 2 follow tutorial.
What a beautiful ornament to hang from my Valentine tree.
ColleenB.
Becca, this is beautiful. Thank you so much for the tutorial. It is great and I can’t wait to try this.
Hugs,
Deb
Absolutely beautiful and easy to follow. Thanks Becca, you are a doll!
Thank you so much Becca for this fantastic tutorial! Loved it, so easy to follow, you’re amazing! :)
I’ve been totally in love with your Spellbinder Heirloom Ornament since you posted it on your blog, and I’ve been dying to try it out myself, but I couldn’t figure out how you made it… now I know! THANKS!!! :D
Love all your work, you are so amazingly talented, your cards and projects are all BRILLIANT! :)
Always looking forward to see your new posts.
Happy new year to you. :)
hugs & love,
Hanna
Becca, this is a fabulous tut and having just received Heirloom Ornament, this is on my “some day” to-do list! Thank you sooo much for such a perfectly explained/detailed tutorial. Reminds me of your Valentine’s basket, which was sooo fun to replicate! TFS!!!
Becca,
I loved your ornament and wanted to try it but I don’t have any type of spellbinders items, thank you for doing it with the heart from the cricut plaintain cartridge. I just received a cricut for Christmas and have been waiting for a project to use the machine. Now I have one. It will be perfect for Valentine’s day coming up soon. My grand daughters will love the honeycomb shape!! Thank you so much for your tutorials, they are wonderful. I have learned so much from your site and your beautiful cards give me inspiration to keep creating!!
~Ginny~
Hi Becca and a big thanks to you, I so wanted to have a try at this lovely bauble. Different shape is great. You inspire me:) Your in my thoughts each day.
This is so totally awesome!! Thanks Becca for the wonderful inspiration!
Oh wow, now where did I put my heart punch!!!!!
How wonderful! You actually make it sound and look so easy. I’m looking forward to trying it with SOME shape…some day. It does make beautiful ornaments.
I have no need for this right now, BUT I want to try it right now, because you make it look like so much fun! :o)
I love this, Becca!!! Thanks for the step outs!!!
Well, you proved me wrong! I didn’t think anything could be prettier than your Christmas ornament. This heart is gorgeous! Now to go see what heart dies I have!
Wow Becca.
I have just ordered the Nested Hearts so I am hoping to try something similar with those. Great Tutorial.
Hugs
Cally ( from across the Pond) x
Amazing…..there are no words to describe this heart…. thanks for a wonderful pictures to wake me up this am…
Thank you for the tutorial. This should make a fun card/gift for friends at Valentine’s Day.
I find that you are several levels above your peers in your designs and the end results of a beautiful cards. You have a gift for seeing how a card should come together. Some are fancy but many easy to put together.
Have you ever designed an infinity/endless card? I just found a tutorial and am having fun matching patterns so the cards looks very special for someone’s birthday.
Thanks, Becca! I never dreamed you’d get to this so soon! You are awesome and we all really appreciate you! Thank you!!!
Awesome! Thanks for the tutorial, Becca!!!
Yea! How cool is that. This reminds me of those tissue wedding bell decorations at weddings, etc. I was wondering how many layers to use, and I’m SO glad you said text weight, because CS is too heavy. I would have used CS, had I tried this on my own, and it wouldn’t have worked. It’s also great that you told us exactly where to stick the glue dots. Have you found a favorite brand of glue dot? If so, can you tell us, or is that not allowed? Thanks SO much for this!
Thanks for the tutorial and how cute!
Oh Becca thank you so much for this wonderful tutorial…it looks just as beautiful with the heart as it did with the Christmas ornament.
Many thanks again
Love Sheila xx
Oh my goodness, Becca. I love this tutorial AND I love how you presented it. I can say it again…you continue to inspire and amaze me…
Loved the tutorial… so easy to follow and with photos! The ideas of a template is great because I had tried this once before and couldn’t keep them together also thanks for the glue dot tip. Love your blog… please, please keep up the great creations and sharing!
Thank you Becca – beautiful!
Sandra ltb
Thanks for the tutorial, I can see many possibilities with this tut.
Awesome tutorial and helpful tips. I always loved the old fashioned honeycomb decorations.
Thanks for sharing! :o)
Love this idea Becca. I am going havie to try this before the week ends.
Wow that is incredible. I love this!! Thank you so much for sharing!!
Great Tutorial. That is just incredible!!!! Have got to try this one! TFS
You are always so kind to take time out of your busy schedule to make these tutorials for us of your fabulous creations. Thanks again!
So pretty!! Thank you for the tutorial, Becca!
Great tutorial Becca, the step-out is just wonderful so clear and easy to follow. The finished product is so pretty. As always Becca, TFS!!! :-D
Oh be still my heart! This is the first time I have ever heard you speak of a Cricut. I am so excited. Your beautiful cards married with the circut will be phenomenal!!!!!!!!!!! How exciting!!!!!!!!!!!!!!!!!!!!!
PS Thanks for the details on making the heart and ornament. : )
Becca,
Thank you for this tutorial, and for making it something that we can use now. You are the greatest and very talented. I enjoy looking at your blog every time I have a chance.
Gale
thank you so much Becca. I have always wondered how the antique honeycomb valentines are made. I am going to try this with real thin tissue paper and lots of punches to see if we can duplicate the antique ones. You are so kind to share so much with us. Your work is simply the best. God has given you many gifts and we appreciate so much that you share them with us. You have been through so much and yet have handled it with so much dignity. You remain in my prayers. I know your heart is breaking
Any chance you will do a tutorial on the butterfly accordion card. Even just the dimensions of the paper and where to cut would be helpful. I just love that card!!
Thank you so much for the tutorial Becca! This is totally awesome! Thank you Thank you. You are so very talented. Thank you for sharing.
Terrific and so well explained! Thanks so much!
This is so cool! I can’t wait to try one! Thank you so much for sharing!
SUPER BECCA!!!! Will give it a whirl!!! THANKS SO MUCH!!!! :)
Fabulous tutorial – thank you so much for all your work putting it together – the heart and ornament are both just lovely!!
This sweet heart is just as beautiful as your Christmas ornament, Thank you, thank you, thank you…for the tutorial!
Thank you for the wonderful tutorial, I love this heart (the ornament was great too)!! You put a lot of love, hard work and your God given talent in each of your projects and we are so blessed that you share with us.
Blessings,
Catherine
That’s what I call pure creative genius!!!
Becca,
Please forgive me for writing to you and complaining about the high cost of the Martha Stewart Double Arches Border Punch. I don’t know where the owner of the on-line site (where I originally found it) is coming from in pricing it at $75.00, but I found it at Michael’s for far less!.
I certainly can’t find enough words to tell you how much I admire your beautiful cards and how thankful I am to you for sharing them with the public.
Becca, thank you so much for sharing this tutorial with us. I just fell in love with your heirloom ornament at Christmas. Can not wait to try this and this heart is yet another beautiful creation.
I think this is the first time I have ever heard you mention a cricut. Is this something new for you? Was it a Christmas present? If so, I think you are going to love it.
THANK YOU again for sharing!!!!!
Marcie
Thank you so much, Becca for this tutortial. You continue to be very generous with us. I don’t take your willingness to share lightly. Thank you.
Oh – I’m a little slow at catching on sometimes… I like it that whenever I post, I have the same green “quilt” symbol next to my comment. That’s so cool!
Hugs
Thanks for the great tutorial. So nice of you that you did it now with the heartshape. Lots of possibilities now!
Thanks a lot!
Love the ornament. Thank you so much for the tutorial. You are a wonderful teacher.
Thanks for the great tutorial. I can’t wait to give it a try. Your work is awesome.
Thank you so much for the tutorial. The heart and ornament are beautiful.
Beautiful tutorial. Thank so much. I am going to make it right now!!
Fab-U-Lous!!! Thank you for sharing.
Too cute! Your imagination never ceases to amaze me! Thank you for sharing.
Another one of my crafting goals is to randomly send cards to friends and family letting them know how much they mean to me. I regularly do that for our sons, but not as good about diong that for other people. My best goal would be one per week, but if I can do two per month, I think that would be a great start!
Love it! Is there a printable tutorial??
Becca, thank you for today’s tutorial. Your creativity never ceases to amaze me — and, you make it look so simple!
BECCA BECCA THANK YOU FOR YOUR TUTORIAL. MY GOAL
IS TO LEARN HOW TO MAKE A BEAUTIFUL CARD THAT SOMEONE
IS WILLING TO PURCHASE.
CYNTHIA
Thank you sooo much for a great tutorial again Becca. Thanks soo much for all the time and efforts you put into this to help us out. I really apreciate that very much. I just hope, I can make anything look as great as yours do.
Have a wonderful day dear friend.
So pretty, your color choices are always just perfect.
Blessings, Lori m
You are so awesome, Becca! To figure this out, and all your other wonderful projects, takes a very creative mind! OMG you’re just so talented. Love this honey comb ornament and will try it out. Thank you for always sharing your creativity…you’re such an inspiration! Hugs, Cami
Thanks so much for the tutorial!! These would also make great party decorations to hang from streamers
Great tutorial! Thanks for sharing! You did an amazing job!
Hello Becca,
Many thanks for this fab tutorial. I love this ornement, and I’m going to give it a try. I would use this for a valentine’s gift, or any other occasion really. It would work well if you did a few and hung them around the garden on a lovely summers day! xx
Becca, this heart is gorgeous! Thanks so much for adding the tutorial as well….wonderful! Now I will have to check the cartridges I have to see if I have a heart to use now! Thanks again!
Oh this is wonderful! Thank you for remembering to make this tutorial. I’m starting NOW to make gift sets of ornaments for the family. Finding the embellishments to place on the ends will take all year but really added that final elegant touch to the Heirloom ornament you made. Thanks again!
Becca, I am so impressed that you know how to do this! I’m so glad you did a tutorial because I just loved your Christmas ornament. I hope I can do one as well. I love the heart too and with February around the corner I’ll be giving it a try. Thank you so much!
Thanks for solving the “mystery” of how it is done :>) Great stuff!
My 2011 crafting goals are 1) to be prepared with lovely handmade cards for all occasions BEFORE they are needed, but made with specific persons in mind so that the love is poured in at the same time as the creation; and 2) reorganizing my workspace to maximize the space available, i.e., to have more space to work in than the 1 foot square I allot now.
Oh Becca, Thank you, Thank you, Thank you for doing this tutorial!!! I have been in love with your heirloom ornament, and wanted so much to know how to do it. I have even gone back to it numerous times and studied it, trying to figure out how you did it. You are an angel for taking the time to show your secrets! Now I am just as in love with the heart as the ornament, and I will have to try them both. You are such a talented sweetheart!
Hugs,
Donna G
Becca, How adorable and sweet, this lovely honeycomb heart! Thank you
for being so creative! Since I don’t have a Cricuit, I have other hearts that will
work. Have a great day…I hope you are warmer than we are here in Wisconsin….chilly, nilly; however, last week we were blessed with rain and warmer temps, melting the snow way down and especially the dangerous ice…and when the colder weather stepped in, most of the ice was gone!
Carol
Thanks Becca !
Oh you generous lady – thank you for the tut. I’m thrilled to have it. Mwah
What a talented lady you are ..I follow your blog daily for inspiration..I live in the U.K. and admire you for the fortitude you have shown in 2010.Every blessing to you for 2011
I’ve definately gotta try this. Too charming!
Oh my how adorable I just love the way you have your new blog now so easy to navigate!!!!
Jen
Becca, Thank you for the easy tutorial! I’m so excited to make the heart and the ornament. And let me see, balloons and bells and oh my goodness, I see all kinds of possibilities! Lady you are incredible!!! Thank you! Thank you! Blessings and hugs! Patty W.
Thanks for the super awesome tutorial Becca! I had kinda guessed at the pattern after seeing your original sample, but your tutorial helped take all the guesswork out :) Have a wonderful day!
Great tutorial, Becca! So happy to have read this. And may I say, your blog really looks smashing. Super. Happy New Year! ^_^
Another great project & tutorial!
Becca what a fantastic bauble and lesson, thank you so much. must have a go at this.
Hugs Trish.
Beautiful as always. Your work is ALWAYS amazing!
Ann
I love this heart! Thank you for your great instructions. A must try project.
Thank you!
thanks for the tutorial – will have to try it out- Happy New Year
Verrrrrrrrrrrrrrrrrrrrrrry Pretty!
Thank you so much Becca…I always love your tutorials and it does help to see something visually. Somehow I get confused by just notes..a picture is worth a thousand words..
Thank you..I will experiment with this one before I use the good paper..Ha ha ha ha
pat
Happy New Year Becca
Thank you so much for making this tutorial. I always wondered how that was done! I appreciate you making it so clear that it seems even I could follow the directions. Now if only I could clone your creativity . . .
Becca, what a lovely ornament, and a fabulous way to lay out your tutorial. I love it! I hope you’re doing well. You’re such a dear, sweet person. Also hope this comment works today. Not sure I’ve been having much luck with that since you made your blog so utterly beautiful. Love you much!
Beautiful ornament and a wonderful tutorial – the layout makes it very easy to follow.
Thankyou for the tutorial Becca the ornament is beautiful, wish I was as creative as you. Anne
Thank you so very very much for this. This is sooo cool and now be able to create it, Yesss! The tut is so easy to follow you are the best!
Looks SO pretty and a super instruction BUT I got confused by your first sentence – I think you might have left out the word FOLD – cause I can’t see they are cut in half. But I am no expert – it is not even my language – just wanted to point it out in case it was a typing error. Best wishes CharlieDK (from Denmark)
Cut 17 hearts and then cut them in HALF ??
I must need more coffee… that doesn’t seem right.. maybe FOLD them in half ?
It looks so beautiful ! Thank you !
Will be giving this technique a try for a sweet valentine for my grandson!
I love the honeycomb tutorial. I can’t wait to try it out!
oh my goodness you are so inspiring. I had lost your link as had saved it on another computer it has taken me a while to find you again, so pleased I have done. Just wanted to say my bows have improved dramatically since reading your blog and cannot wait to catch up on all that I have missed since I got the new computer
Hugs and Happy New Year to you
Kate xx
Thank you so much for this tutorial I am going to give it a try!!
i really appreciate all the tutorials you provide. thanks
Hi Becca, Thanks for the tutoral, your the best , I love everything and I mean EVERYTHING you make .
God Bless, Diane
Thanks for the tutorial. The ornament is really cute!!1
Debbie B
Becca,
Thank you so much. It is beautiful. Do you recall where you got the crystals for the ornament?
Becca you do a great job and your tutorails are so easy to understand. Keep up the good work, You are a real blessing. Thanks, Frances
Thank you for your tutorial. I went ga-ga when I saw your spellbinder’s die ornament the first time. I can’t wait to make this. God Bless You, Tina
This is so cool, love this idea, you could use 1/2 of one and put inside a card to make a 3d pop up heart! Thanks for sharing
Becca, love the heart ornament…how clever and pretty!
I think you mean fold in half, not cut in half?
Becca – Thanks so much for the tutorial. Can’t wait to try!
Back home now and itching to try this. Thanks so much for the tutorial!
Hugs
Anne (UK) x
Thank you so much for this Honeycomb Ornament Tutorial. I have been anxious to learn how you made such a wonderful design. I also liked Cathy A.’s idea of making half a heart and placing it inside a card. I learn something everyday I visit your site. Thanks for sharing. Linda
I made the honeycomb ornament with heart shapes, but my glue dots aren’t holding. Any suggestions?