I’m back with a quick post for today.  This card is simple but it took me way longer than it should have.  Life was pretty crazy today so I was called away from this several times.  I joked with a friend that the card took me 4 hours but the box took me 4 minutes. 

The little box was one I got from the $1 bin at Michaels.  They are satin colored and come in several colors.  I knew that one day they would come in handy.  Here’s another look below:


Supplies:
Stamps:  Lockhart Stamps; Rubber Cottage Stamps
Ink:  Black Brilliance; SU Bordering Blue; Versamagic Aegean Blue
Paper: Canson Effects Paper; Bazzill
Accessories:  Nestabilities, Copics; Michaels Velvet Ribbon

pinTHIS SHAREthis TWEETTHIS EMAILthis
  • JanineMay 6, 2008 - 2:14 pm

    ABSOLUTELY FABULOUS!!! I love your work!!!ReplyCancel

  • Deb ZaMay 6, 2008 - 2:28 pm

    OMG–your work is absolutely inspiring! WOW!

    I keep going back to the embossed square in the center of the larger square. I just got my square nestabilities and haven’t played with them that much–but this is one thing I have to try.

    Your an angel for sharing this!ReplyCancel

  • MicheleMay 7, 2008 - 5:21 am

    This is absolutely gorgeous!!!ReplyCancel

  • Jamie W.May 7, 2008 - 7:51 am

    Oh, this is just exquisite! I’ve been on the fence on buying that stamp, but seeing her done up so beautifully has helped me make up my mind. Thanks so for your inspiration with your beautiful pieces.ReplyCancel

  • Debbie OlsonMay 7, 2008 - 9:41 am

    Becca, this is gorgeous! I know what you mean about four-hour cards. . . I have my share of those by virtue of how late I get to start stamping at night! Your box is lovely as well. TFS!ReplyCancel

  • WendyMay 7, 2008 - 5:35 pm

    I just found your blog when I googled ribbon storage and I am very glad that I did!! Wow – you are incredibly talented! I love your style and your use of textures. Impressive work – thanks for sharing! (And yes, your method of ribbon storage is the one that I’m going with – after seeing many different ones – great idea!)ReplyCancel

  • Sharon HarnistMay 8, 2008 - 10:04 am

    Wow, talk about showcasing Nestabilites — this card does just that! I love your use of the Nesties here and of course the Lockhart Gardening Angel is a favorite of mine, too! Wonderful gift set!ReplyCancel

  • DebJuly 8, 2008 - 2:39 pm

    I found your blog a couple of days ago, I cannot tell you how beautiful your work is. I visit a couple of times a day, inspiration!
    Thank you for sharing your talent with everyone!
    Since I visit so much and enjoy it, I have something for you on my blog. I just think everyone should stop and look at your creations!!
    hugzReplyCancel

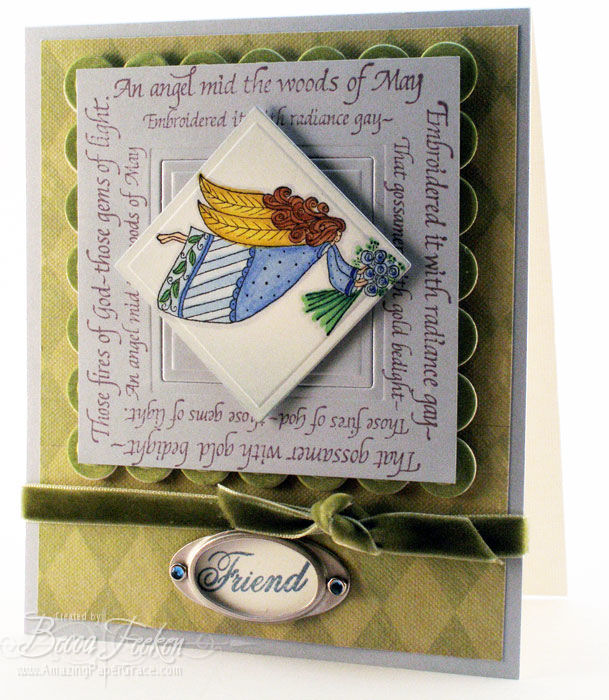
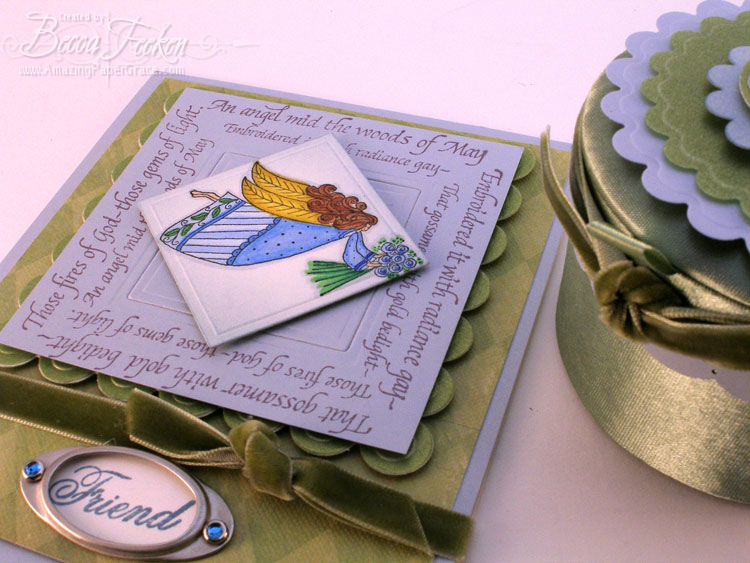
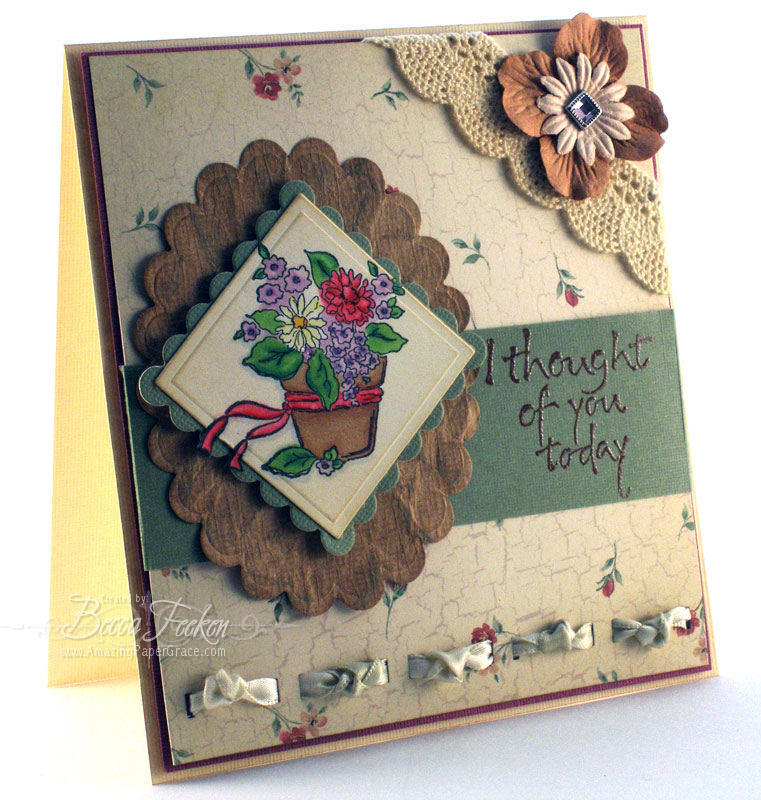
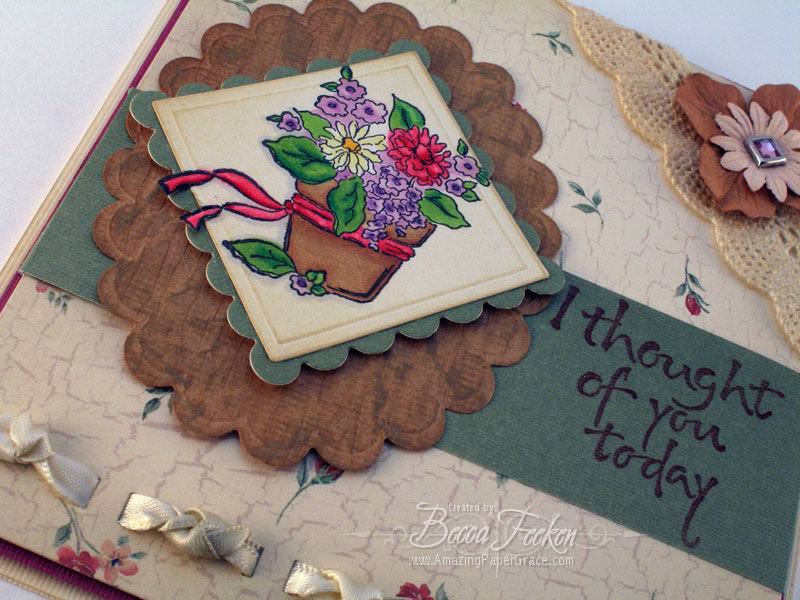
I love the vintage look, I have a ways to go, but it’s fun trying.  For this card, I took my design paper and punched the bottom with a Martha Stewart ribbon punch.  I threaded the panel with narrow ribbon distressed with Old Paper Distress Ink then wrapped a 2" strip of green cardstock around panel.  The lace is stippled with Old Paper Distressed Ink then spritzed with Sugar Cookie Glimmer Mist before gluing to the panel.  The panel is then mounted onto cranberry cardstock and popped  up over an ivory card base sponged with Antique Linen.   I took white cardstock and stippled on AntIque Linen and Old Paper Distressed Inks before stamping the flowers with Black Brilliance and coloring them with Copic Markers.  The image is layered onto green cardstock cut with a Nestability square and then popped up on a panel cut with a Nestability oval.  The oval layer was crumpled and Old Paper Distressed Ink taken directly to the paper.  The oval was ironed to flatten it and glued directly to the panel.  The sentiment was stamped with Coffee Bean Brilliance and embossed with clear embossing powder.  The final touch was a pair of Prima flowers secured by a brad bling.  The camera doesn’t nearly capture the distressing – it’s subtle, but here’s a closer view:


I was tickled to figure out a way to keep the ribbon on the flower image even though it did not fit into the Nestability.  I ended up cutting the end parts of the ribbon manually and tucking them under the nestie while cutting and embossing.   That really opens up a whole ‘nuther realm of possibilities!

Supplies:
Stamps:  Flowers – Impression-Obsession; Wordsworth – Sentiment
Paper:  Bazzill, Making Memories
Inks:  Old Paper, Antique Linen, Black Brilliance, Coffee Bean Brilliance
Accessories:  Copics, Nestabilities, Embossing Powder, lace, prima flowers, ribbon, Martha Stewart Ribbon Punch

pinTHIS SHAREthis TWEETTHIS EMAILthis
  • nancy bMay 4, 2008 - 8:30 am

    Just beautiful. I also love this vintage look and you make it look so easy to accomplish. Thanks for sharing!!!ReplyCancel

  • Kay McBrideMay 5, 2008 - 8:32 am

    this has got to be my favorite of all so far, and all the work it took, gosh it is so beautiful, im kinda confused about the ribbon stamp look, u will have to explain to me. dont u just love those new punches from martha, i broke down and got the ribbon one the other day and love it. the lace and flower just put the most totally awesome ( that is horrible english) touch to the card. we will have to talk about this card. a class would be nice on all the touches!!!! hint hint.ReplyCancel

  • Kay McBrideMay 5, 2008 - 8:33 am

    i forgot to say u just know so many cool techniques u are a walking book of stamping knowledge. im glad im fortunate enough to be acquainted with u!!! and wish i had a forth of your talent.ReplyCancel

  • JanineMay 5, 2008 - 8:22 pm

    Just beautiful!! I love the colors and the image is perfect!ReplyCancel

Sifting through my things, I came across an image that I watercolored years ago.  It seemed a shame not to put it to use, so I cut it up and put it on my next card.


The sentiment on the card is "Time changes many things…But not the joy your friendship brings."


Like the sentiment, time changes many things — I’d like to think that I would color this differently today and most certainly it would be popped up on layers to give it more dimension, but quite the welcome for a quick card today. 


On the bottom I used  some elements called Ka-Jinker Jems and they are attached with a tool called a Ka-Jinker.  It reminds me of the tool used to attach price tags to clothes, but it’s a tad different because it inserts a plastic stem in the center of a one hole flower button or gem.  Lots of fun…it makes my white flower look like it has a yellow stamen.  Yes…..I find joy in the littlest things.  I hope you do too!

Supplies:
Stamps:  Stamps Happen
Paper:  Bazzill, Canvas Paper
Ink:  Black Brilliance, Watercolors
Accessories:  Cuttlebug Swiss Dots Embossing folder; Kajinker and white flower buttons


pinTHIS SHAREthis TWEETTHIS EMAILthis
  • SmilynStefMay 3, 2008 - 8:18 pm

    Isn’t it fun to revisit things from our past to see how we’ve changed … love the embossing at the top and bottom those fun yellow flower centers … it’s the little things that matter.ReplyCancel

  • Pat (Just4fun2 on SCS)May 4, 2008 - 8:30 am

    Wow Becca… You have so many cool older stamps. You work is awesome! TFS.ReplyCancel

  • nancy bMay 4, 2008 - 8:33 am

    You are the queen of stamps!!! This is great stamp and a precious card. Love the simple touches you give that just make your creations pop out. Love that cuttle bug dot!!! A must have as soon as I find it…maybe sitting on top of a shelf somewhere!!
    thanks!ReplyCancel

  • Linda KlebackMay 4, 2008 - 11:01 am

    And you even use up older images! I can’t even FIND my older images!!! This is a great card,ReplyCancel

  • Kay McBrideMay 5, 2008 - 8:25 am

    pretty pretty, love the stamp and watercoloring. that kajinker is cool. i have the tagger and have never used it. wonder if i could make it do that?ReplyCancel

I N F O