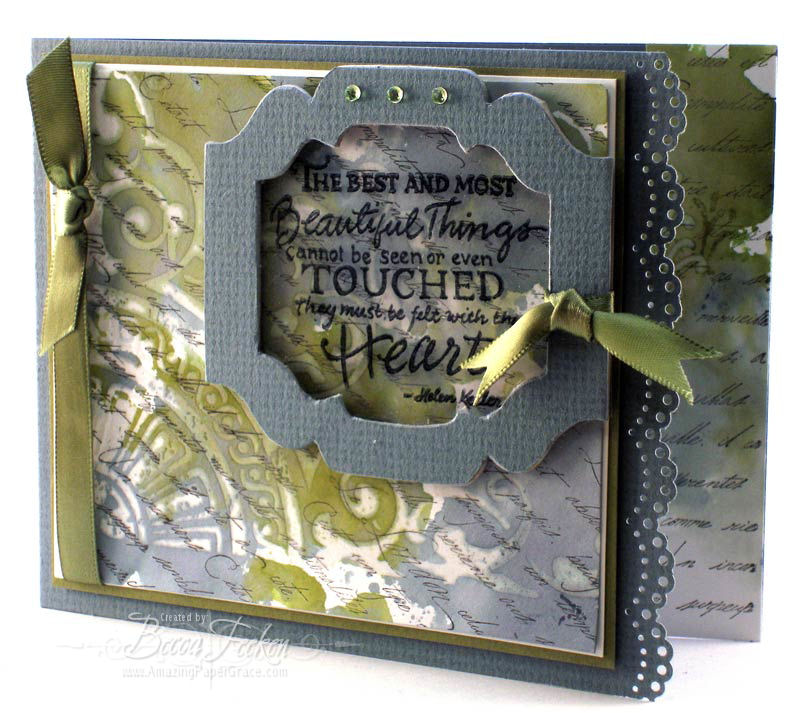
I had an opportunity to try a really neat technique tonight.  I guess it is a resist of sorts – can you believe I’ve never ever tried this!!  I had it in my mind that I wanted to make my own design paper (how rare is that?) so I stamped a script stamp with black brilliance on white paper.  Overstamping with Versamark, dusting with clear embossing powder and heating it moved me to the next step.  On a teflon sheet I squiggled out SU Bordering Bue and SU Old Olive and misted them heavily with water.  I layed the paper down flat on the ink and picked it up and moved it a couple of times.  After I got the colors looking how I wanted, I dried the paper a bit with my heat gun and then I ironed it the rest of the way dry. 

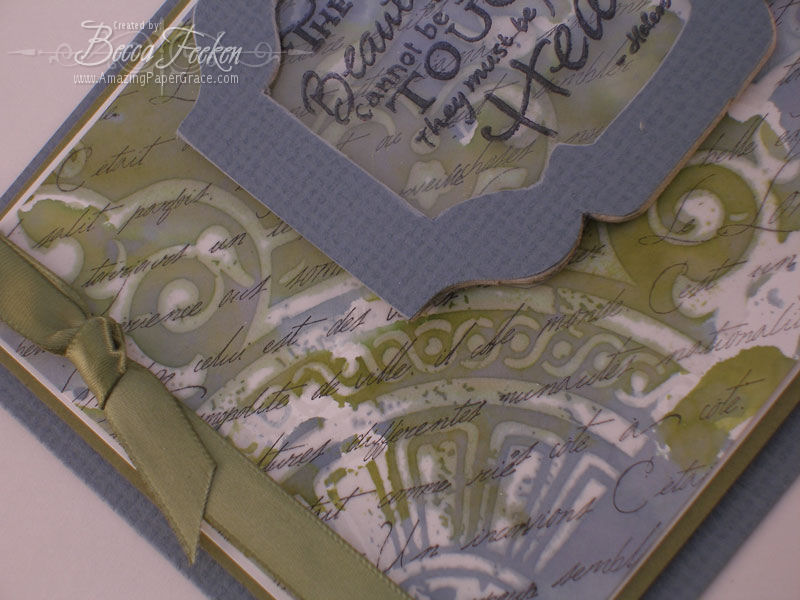
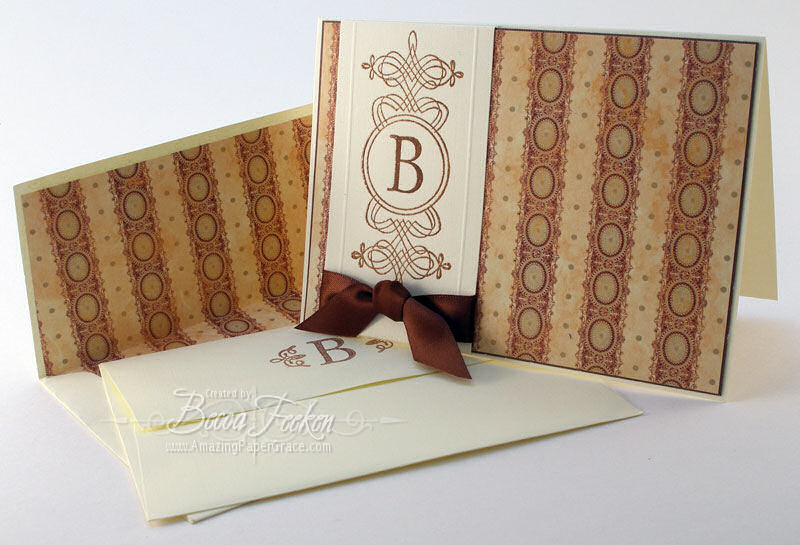
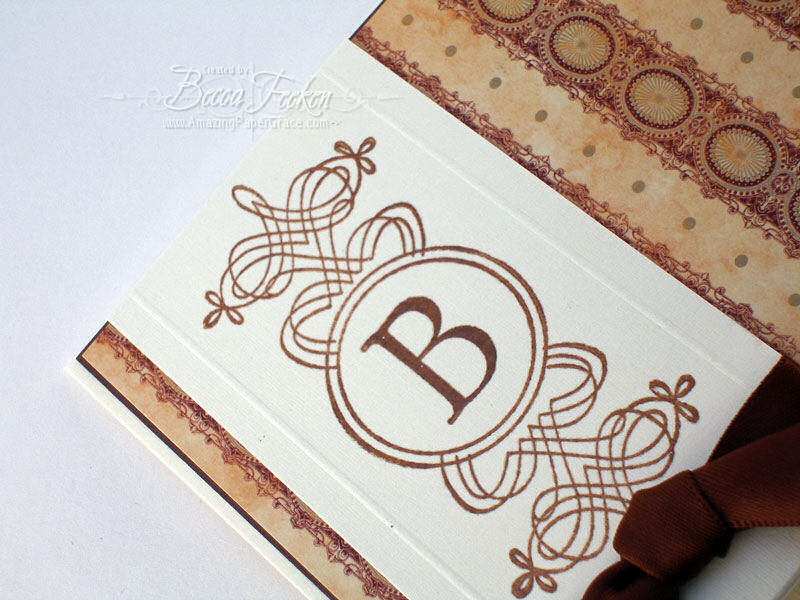
Just above you can see the detail left by the clear embossed stamp.  The stamp set I chose was Fancy Pants – From the Garden.  The stamp is absolutely huge – I have huge acrylic mounts, but nothing that would take this behemoth – so I had to finagle it kind of diagonally yet hanging off – it all worked out. 

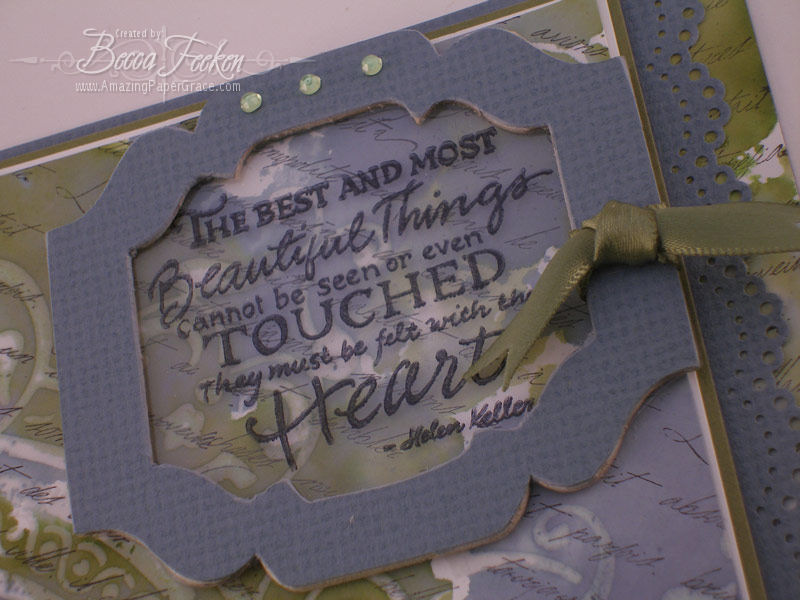
Because I wanted as much of the paper as possible to show, I added a chipboard element that I backed with acetate that had my sentiment stamped in black stazon.  Lastly I wanted the paper to show through the punched scallops, so I added a thin strip on the inside of the card to accent the opening.

Supplies:
Stamps:  Fancy Pants – From the Garden; Stampabilities – La Londa Script; Sentiment – PSX
Inks:  Black Brialliance, Black Stazon, Versamark, SU Bordering Blue Reinker, SU Old Oliver Reinker
Paper:  White Cardstock, Bazzill
Accessories:  Chipboard, ribbon, clear EP, acetate, ribbon, crystals, MS Scallop Punch

Have yourself a glorious day!
 

pinTHIS SHAREthis TWEETTHIS EMAILthis
  • nancy bMay 21, 2008 - 7:45 am

    Absolutely stunning……I believe you should teach this at a gathering??? please??? thanks for sharing.ReplyCancel

  • Kay McBrideMay 21, 2008 - 11:02 am

    oh gosh, i agree with nancy, this is absolutely amazingly stunning. u may have invented something here, before long u will have your own line along with timmy boy. the card is so neat , i am going to try something like this but sure would like a demo…..hint hint…please please. thanks for sharing.ReplyCancel

  • Debbie OlsonMay 21, 2008 - 12:28 pm

    Becca, you are SO creative! This is absolutely lovely!ReplyCancel

  • JanineMay 21, 2008 - 6:09 pm

    This is just AWESOME!! Nancy b. is right!! Teach me please… If I lived in your neighborhood I would be there in a flash!!
    Just gorgeous.ReplyCancel

  • LoniMay 21, 2008 - 7:43 pm

    Becca, this is beautiful!! Every time I come to your blog I am awed and inspired. I wish I had this on my desk so I could look at it all the time. Bravo! I’d sure love to live by you, too!ReplyCancel

  • SmilynStefMay 21, 2008 - 9:01 pm

    Way way cool … you made my jaw drop in amazement … this is so lovely … thanks for the instructions.ReplyCancel

  • Jamie W.May 22, 2008 - 10:17 am

    Beautifully done, Becca. Your pieces are really works of art! I really appreciate your instructions too. =)ReplyCancel

  • Melanie aka BatgirlMay 22, 2008 - 2:13 pm

    wow this looks awesome! Im going to try this now!ReplyCancel

  • Jody MorrowMay 22, 2008 - 5:36 pm

    Beautiful card!ReplyCancel

  • LaurieMay 22, 2008 - 7:11 pm

    Gorgeous! I love the idea that you just let your stamped background do the work. It didn’t need anything else.ReplyCancel

  • heather the mooseloverMay 22, 2008 - 7:28 pm

    Absolutely gorgeous!ReplyCancel

  • Trish DMay 23, 2008 - 12:38 pm

    This is stunning – love the colors!! (BTW, you can use a cutting plate from the cuttlebug or Big Shot for those huge acrylic stamps)ReplyCancel

  • […] The background is a small square I had left over when I made the background on this card here.  It’s another embossed resist background and the details on how to reproduce that […]ReplyCancel

  • Angela BrennanSeptember 1, 2008 - 4:52 pm

    An absolutely gorgeous card. I love the originality of it. With my stamp stash, I can do many many background with different colour combos. Thanks very much for sharing.ReplyCancel

  • Emory DavisNovember 12, 2008 - 8:49 pm

    ymw4oaddtvsvf1qmReplyCancel


Here’s another one of those adorable mice.  I was in the mood to try to color, so I pulled this set out again.  The mouse is colored with Copics and for the ground I stippled in Antique Linen Distress Ink.  I just could not find the right color ribbon for the card – I actually had two other colors I thought would be final.  Yet I ended up disassembling the card even after I had taken pictures….that’s how much I didn’t like the ribbon.  I settled on this Papertrey Ink ribbon – Sweet Blush…I dulled up the stitches by going over them with my Y21 Copic.

Best wishes for a glorious week, friends!

Supplies:
Stamp:  The Angel Company
Ink:  Black Brilliance; Antique Linen Distress Ink
Paper:  K&Co – Brenda Walton Small Wonders Girl; Bazzill
Accessories: Copics, PTI Ribbon – Sweet Blush, Martha Stewart Border Punch, MS Tag Punch, Nesties, Kajinker


pinTHIS SHAREthis TWEETTHIS EMAILthis
  • Janice N.May 20, 2008 - 6:16 am

    My sister and I have been waiting patiently for your next posting. This is just soooo cute. Love the colors! And of course, your mouse is adorable. Thanks for sharing your amazing talent with us.ReplyCancel

  • Stephanie HerbertMay 20, 2008 - 4:32 pm

    Love the card! It’s adorable. Awesome blog too!ReplyCancel

  • Kay McBrideMay 20, 2008 - 6:09 pm

    love the mouse, im sure the other ribbon was fine. but i know its got to be …….. u know… and it is. precious card i like the square and oval nest. mix. thanks for sharing your wonderful talent.
    hugs…. kayReplyCancel

  • nancy bMay 21, 2008 - 7:47 am

    just precious!! love the ribbon.ReplyCancel

  • JanineMay 21, 2008 - 6:07 pm

    He is just soooooooo cute!!!ReplyCancel

  • Kelly VMay 22, 2008 - 12:38 pm

    Bec, I love this sweet little mouse….Love how you tied that ribbon and loved the button with the tag….Duh, never would have thougt of that on my own……You never cease to amaze me…..Love you, SweetieReplyCancel

  • Kelly VMay 22, 2008 - 12:40 pm

    Bec, I love this sweet little mouse….Love how you tied that ribbon and loved the button with the tag….Duh, never would have thougt of that on my own……What is that little acylic flower? Is that a button too? Do tell. You never cease to amaze me…..Love you, SweetieReplyCancel


I love monogram cards and took a moment to sit down and work up one that I may make into an entire set.   This was very easy to put together and has simple, simple lines.   These can certainly be whipped up quickly for a gift and put into a decorated box or tin. 

Supplies:
Stamps:  Martha Stewart
Paper:  Bazzill; DCWV
Ink:  Versamagic – Sahara Sand
Accessories:  Ribbon, Clear Embossing Powder

Thanks for stopping by today.  Happy Friday and I hope you have a fabulous weekend planned!

pinTHIS SHAREthis TWEETTHIS EMAILthis
  • LoniMay 16, 2008 - 2:56 pm

    Becca, I love both your monogram card and the Wordsworth card! You do such elegant work. I have sort of a love/hate relationship with Martha but I sure like that monogram stamp and scalopped punch. Question: is the monogram on the envy flap the same stamp as the larger image or a different one? Both cards are so lovely.ReplyCancel

  • SmilynStefMay 16, 2008 - 8:55 pm

    My oh my … I love both new cards … absolutely fabulous!ReplyCancel

  • Debbie OlsonMay 17, 2008 - 11:55 am

    So elegant and lovely, Becca! I love monograms too, as well as Wordsworth stamps!ReplyCancel

  • Kay McBrideMay 17, 2008 - 3:23 pm

    pretty monogram, was that all one stamp or several and is it in a set or did u put it together, and i agree with loni is the stamp on the env. part of the monogram stamp or a different one. thats a really pretty card. thanks for sharing becca.ReplyCancel

  • JanineMay 18, 2008 - 6:44 am

    Just beautiful!!!ReplyCancel

  • BeateMay 18, 2008 - 7:46 am

    Gorgeous card and matching envelope! I love that you lined and stamped the envelope to match!ReplyCancel

  • Sharon HarnistMay 19, 2008 - 10:38 am

    What a gorgeous monogram and beautiful paper . . . love your card!ReplyCancel

  • denise bryant (imchatty)May 20, 2008 - 10:09 pm

    Wow…I love your monogram cards. So beautiful and elegant. Have you ever seen the JustRite monogram stamper? I think you would like it. BTW, love your blog and added you to my Google Reader…and I found you through the SCS forums!ReplyCancel

I N F O