

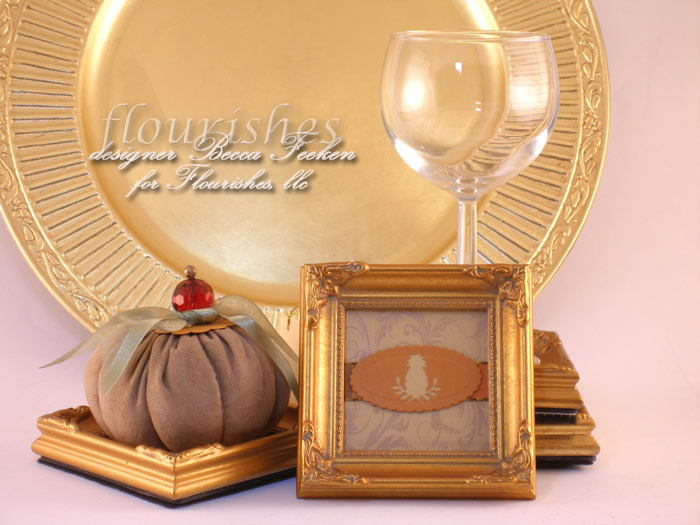
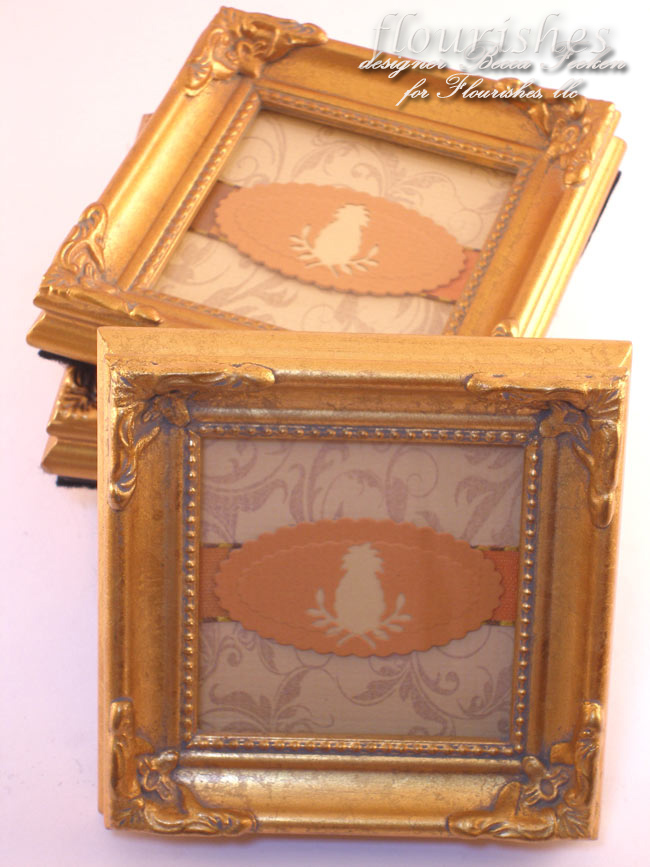
I had so many ideas floating around in my head from the Dinner Setting and Program I created last week, that I sat back down to create more items to match the ensemble I showed last week. This time I came up with a set of coasters to go at each place setting. So that the coasters can be used over and over for different occasions I tried to think of something durable to use for the base. Picture frames came to mind! With square frames from my stash, the coasters were an easy and quick project. Mine are 3 x 3 (inside dimension) but I recommend a half inch or inch larger. Keeping with the ensemble I already created, on matching cardstock I stamped the Flourishes Damask Background and embellished it with the same ribbon and punched ovals.
All of the hardware had to be removed from the back of the frame while trying to preserve the backing piece. I simply bordered the back side of the frame with the grabber part of velco and covered the back with felt. When it’s time to change the insides of the frames, the felt will peel back, the picture door will lift, new items can be inserted and finally the felt matched back to the velcro.
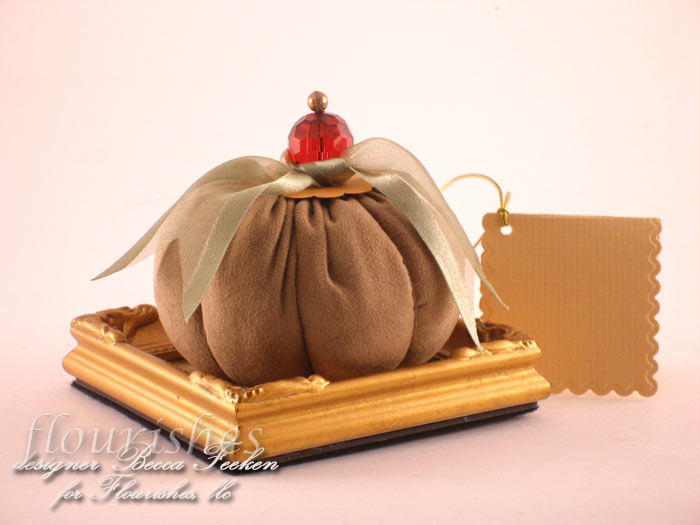
I also wanted to create a momento for our guests to take home so I created this pumpkin. The pumpkin is a 9" circle and the fabric I chose was a faux suede from my stash. Although Its difficult to see because of the lighting, I stamped the Flourishes Damask background stamp with Cosmic Copper Brilliance on the fabric and heat set it with my iron. As if I were making a large yo-yo, I ran a big basting stitch around the outside of the circle which I turned down a quarter of an inch. Once finished, I gathered, stuffed then tied closed. To finish I added a scallped circle cut from paper, a large cranberry colored bead with a bronze pearl and tied a green bow for leaves.
Supplies:
Stamps: Flourishes Damask Background
Ink: Brilliance Cosmic Copper (Pumpkin), Brilliance Pearlescent Beige (Coasters)
Paper: Bazzill
Accessories: Nestabilities Oval, Brenda Walton Pineapple Punch-Retired, Ribbon, Velcro, Felt, Faux Suede Fabric, SU Scallop Punch, Faceted Bead, Pearl
Happy Friday, I hope everyone has a blessed weekend!

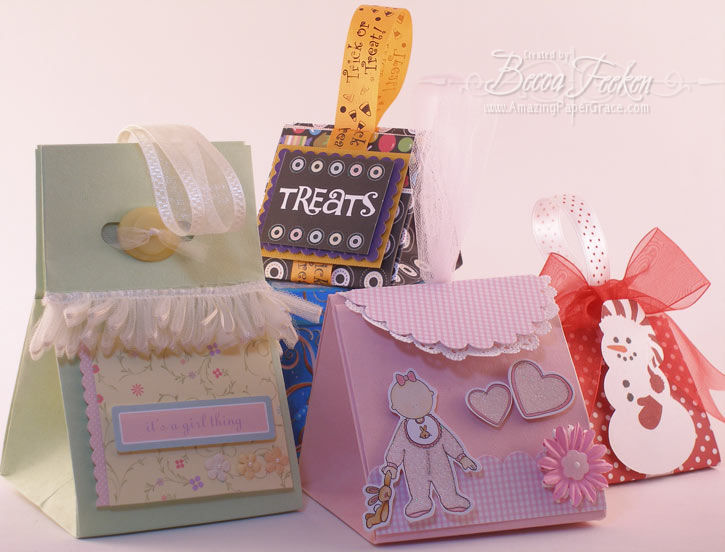


Thank you for sharing the tutorial for these cute little triangle boxes with us! I really liked that you made your tutorial so clear and easy to follow!
Dot
Those boxes are adorable, especially the soft green one on the far left.
Thankyou for your very clear video tuturial. I cannot wait to have a go at making these.
Thank you so much for sharing – the boxes are ADORABLE! Do you ever write out instructions or make templates? I’m just one of those folks that does better when I can reference instructions. TIA.
Incredibly cute box! Thanks for the amazing tutorial. :O)
Becca, you boxes are so cute. I thought your tutorial was great and love that you are so ‘real’ in the video. Very friendly sounding. Thanks for the tutorial. I’m going to give the box a try.
Hi Becca,
Love your tutorial…
Had a go with some copier paper…way cute…will be making some with card stock for sure…
To hide my excess ribbon on the ‘lid’ I just looped it back so it was secured by the brad on the back side too…still taped the other end though.
Thanks again for your video tutorial
ps..I don’t think your link to the cricut paper is working…well that is to say it’s not working for me – not sure if others are having the same problem
You are just too cute!
Don’t ever change.
These videos are so enjoyable to watch.
Your voice and smooth way of showing
how to do seemingly difficult things is
perfect.
((HUGS)) TR
Really nice video tutorial Becca. I will try to make one even though I don’t own a score tool.
God bless
Giovana
Love boxes bags etc. thanks so much for sharing a great video. I have my notes for supplies and will watch the video a second time and work with you so I get it right. Thanks Ann
Becca… thankyou so much for showing us how to do that. I am on my way to my studio to play away!!
Janine
Thanks so much for the great tutorial. I am off to try my hand at making some. Enjoy your posts so much!
Thank you for the wonderful tutorial. You just inspired me to use this brilliant idea for my wedding favours! *hugs*
Becca these are wonderful!! I love the little boxes you made, and your voice is so soothing!! You’re a natural for these videos!!
hugs, Jami
Becca…..Thanks for the great tutorial. I stop it and printed out page after page so I could save it and use when I get ready. Great little triangle box…..thanks for sharing. By the way….you’re getting good at this video thing….next it’s the red carpet.
Amazing boxes!! Great tutorial!!
I have an award for you, in my blog. Thanks for sharing your creativity!! :)))
Hugs, Hege
Great video! I followed right along and my triangle box came out perfect. Your video was very easy to follow. You make the hard so easy! Thanks for sharing your wonderful ideas.
Those are great boxes. I followed along with your tutorial and the box came out perfectly!
Great tutorial!! Tagged you on my blog!!
Becca, great tutorial — full of wonderful and important details. Thanks so much for taking the time and doing it!
Becca,
Well you did it again. GREAT tutorial!!!!!
I too followed along with you tutorial and my box came out perfect.
Just can’t thank you enough. ; )
Great BIG ((hugs)) to you.
~~Diane~~
WOW! Thank you so much for the video! You did a super job with the instructions and I can’t wait to try it. You are truly an inspiration and a blessing.
Great job, thanks for the tutorial. These are adorable little boxes!
Becca
Thanks for the tutorial! I just love making boxes to share goodies – now I can add these to my collection!
Thank you!
Hugs,
Joani
I loved you tutorial! Thanks so much.
they are all so cute!! the button closure is clever, as is the hole box, thanks for sharing!
These boxes are so cute. I followed along as you demonstrated with a piece of notepaper and it worked out perfectly.
Becca, your tutorial is wonderful. I couldn’t wait to try one myself. I agree with other commentors that you voice is so sweet and your a natural for teaching!
Adorable little boxes! Awesome tutorial!
How fun! Thank you, and you know you are marvelous, right? I get so inspired when I come to your blog!
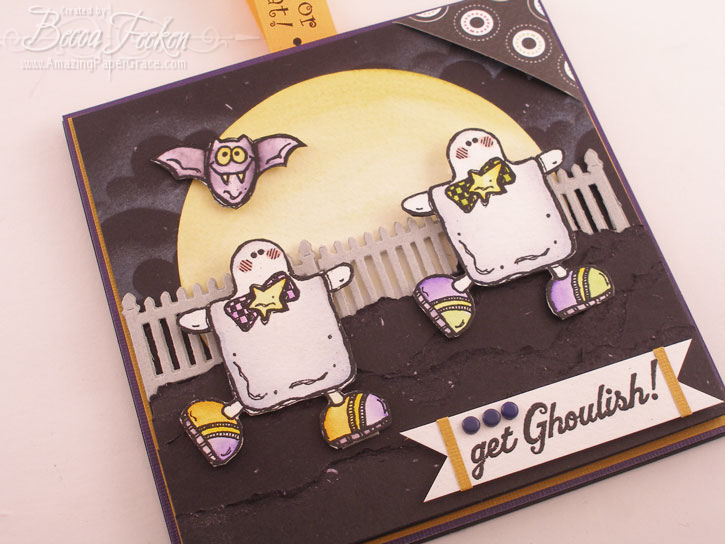
What a great idea for Halloween! Thank you so much for sharing!! I just love your blog!!
These are all so darling! How wonderful that you took the time to make a two part video tutorial! Fabulous! Thank you!
Becca this tutorial is awesome! Great job. Your boxes are so cute. My favorite one is the one with the button, super cute.
Hugs,
Stephenie
The boxes are cute and your directions were very clear.
But, I really want to comment on the quality of your video. Your voice is calm and soothing; you were not rushed and frantic as so many videos seem to be. CONGRATULATIONS on making a great video.
I went to You Tube to find more of your videos. I found one for the circle frame using punches – again, an excellent video. I wish you had more videos – I really like your style!
thanks for the video instuctions!! here i am a week late but you will have to forgive me i had a tooth pulled last week and boy did that put me down. i will def. try the box. they are so cute.
hugs
kay
I really liked the box but I was so impressed with the button closure. I can see a lot of possibilities with this type of closure.
Thanks for sharing your creativity
Good work, great tutorial. Thanks for sharing.
Your intructions are fabulous. So much so that I feel I just might be able to do this. Thank you
Becca, Love the name by the way. It is my DDIL’s name spelled the same.
I watch your video, then went and got my supplies came back played the video again and made one right along with you. It was great.
I love these little boxes, I think I will make them for DGD secaond grade class.
Thank for such a great tutorial. AndreaA
Easiest directions ever…very cute!!