

This is a project that I’ve had on my mind for a while but it wasn’t until I was in the middle of the project that I realized how many ways I could spin the project or different ways I could apply it. These are simply covers – restaurants have them for their menus and and change out the breakfast menu to the lunch menu and so on.
I’ve always wanted to throw a little tea party or have High Tea and I thought some sort of menu cover would be nice – it would be a place where I could list all the morsels set out to taste. Then I thought wouldn’t it be nice if I could use the same thing for a spring dinner or a cookie party and then my mind spun out of control.
They are so easy to make, I thought a collection with different covers and occasions would sure be easy and would use up all those chipboard tablet backs that I’ve saved. I recently taught a class and this sure would have been the ticket to list the project instructions, at-a-glance, and prop it up in the middle of the table. So let me get into how I made this one.
| Harmony Classic Oval Stamper II Ensemble | Chipboard backing from a tablet |
| JustRite Brayton Font | Two 12 x 12 pieces of design paper |
| JustRite Special Occasions Font | One 4 x 11 piece of solid paper |
| Spellbinders Classic Ovals Large | Fabric tape or silk medical tape |
| Spellbinders Petite Scalloped Oval Large | Aggressive glue runner |
| Spellbinders Classic Scalloped Ovals Large | Pink Ribbon |
| Hobby Lobby Felt Border | Pop Dots |
| SU Pixie Pink | Transparency cut in 1″ strips |
These are the steps I followed to make this particular cover:

I recycled the backing from the watercolor tablets that I use. They are amazingly thick and I had no idea where they would come in handy but I knew that one day I’d find something. Now I know. Any type of chipboard will do, but to me it seems that thicker is better. Cut as shown in the picture above.
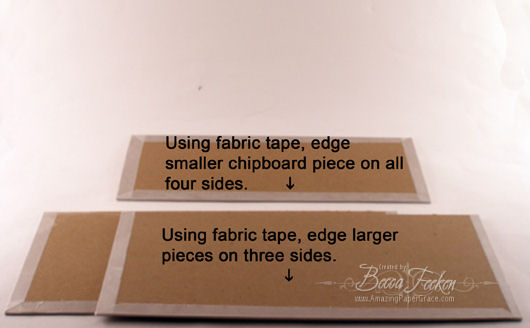
I wanted something to finish off the edges so that you could not see the chipboard and wrapping the paper around the edges might have worked but I didn’t want to try it. At some bookbinding shops you can purchase fabric tape – I don’t have that luxury so in our bathroom I found some silky medical tape that the nurses swore by. I’ve never had to buy it and it seems we have a few rolls laying around. On the inside of the roll it says it is manufactured by 3M and is called Durapore. Use whatever will work for you – even masking tape in the right color might fit your color scheme and tone.
Take your design paper and match it up to the correct piece of chipboard – set aside the smaller piece of 4 x 10.5 chipboard for now. If you like, you can trim a sliver off of each side so your binding will show just a little bit. I put my plaid design paper on the front cover and the back cover and then put my busy print on the inside. With an aggressive adhesive, cover front, back and inside while arranging unbound edge on the inside. ![]()
Roll out a good length of tape and place the sticky side face up. Hold your cover together in the correct order. Apply the unbound edges, which will be the center hinge, to sticky side of the tape taking care to center it so you will have an equal amount of binding on both sides of the center hinge.
![]()
Open up the cover so that the taped portion is on the outside. Cover the inside with the continuing length of tape taking care to overlap and cut it off at the bottom as inconspicuously as possible.
![]()
Pick up transparent strips and fold as shown above. Pickup the white solid cardstock that is 4 x 10.5 inches. Place adhesive on the back in each corner. Place a transparent corner on each of the four corners so that the longer tails should be seen on the backside and a clear triangle on the front side. Glue to chipboard piece that is 4 x 10.5 inches.![]()
On back side run a line of adhesive and tack down a length of ribbon that is at least 14″.
![]()
Flip ribbon to the front and glue the completed panel to the inside right side of your cover. Trim the ribbon and add a v-cut for decoration. ![]()
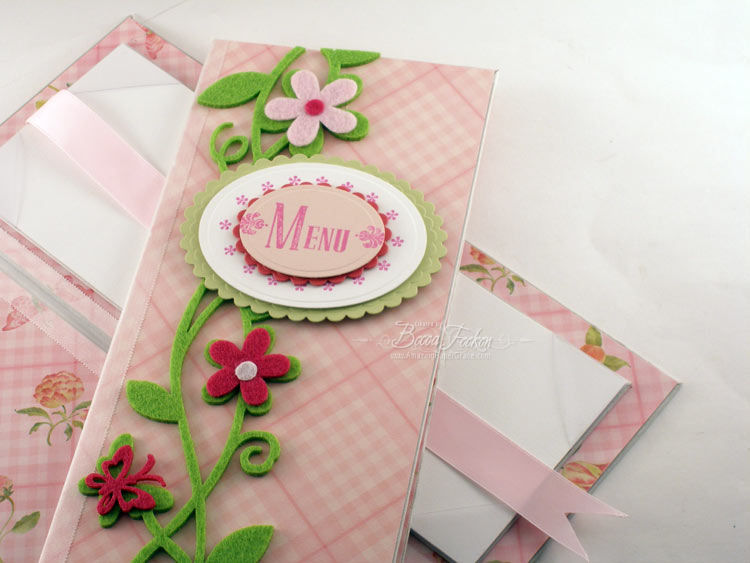
Now I cut each of the above Spellbinders to layer as a medallion for the front cover.![]()
I stamped the word Menu using the Brayton Font and two flourishes from the Special Occasions set. On the larger oval I stamped the ring of flowers from the Harmony Classic Oval Stamper II Stamp Ensemble. I then layered them from smallest oval to largest. I glued down a length of felt border and once arranged, I placed the medallion. ![]()
I’ll be making more of these for sure . . . now I just have to save more backing!
Don’t forget, today is new release day for Our Daily Bread Designs. Today Kelley is releasing a new set called You are the Potter and I featured a sneak peak earlier this week. She is also releasing the Serenity Prayer!! ODBD has a big surprise planned on March 17th and my lips are sealed! You’ll need to check back to see what’s in store!!
Thanks for stopping by!!


Oh Becca your creativity continues to impress me. I always look to your website daily for inspiration, not just for cardmaking ideas but a kind and motivational word. God has blessed you, and therefore you are allowed to bless us.
Thanks,
Tiffyanna
Really lovely! I really like the way your tutorials are very detailed – no questions on this end. Hope your Sunday is blessed in many ways!
What a great project and so pretty-looks like something for a spring get together. tfs your instructions.
How beautiful!! I just love all of the layers. I might have to bust this out for my parents’ anniversary
How clever! And so pretty.
another beautiful project
Hugs
Norine
This is beautiful ! would love to be invited to your tea party!
Love the idea…thanks for sharing the instructions!
Charmaine
Gorgeous project!!! I absolutely love it. Thanks so much for sharing your amazing talent.
Becca,
I just love it.
Great job with your tutorial as always.
Have a wonderful week.
~~Diane~~
Becca, you are one of the most talented people I have ever run across. This project is spectacular. I love the idea and you have inspired me again. Thank you.
FRESH…SPRING…ADORABLE!!!!! What a great project and the colors just zing!!! Loved it. Thanks for the great tutorial as well.
Fabulous…………….love this little number.
Becca, this is awesome! I just love the way you did the cover with the scrolls. Thanks for the tutorial. I see Just Rite stamps on my next order….
What a great idea. Thank you.
This is so cool Becca…and also very pretty…TFS
Gorgeous, great tutorial, thanks for sharing!
Oh my gosh, how adorable is this, so perfect for a tea or luncheon, your guests will love them!
This is so cute! I love your creative ideas and how after seeing your posts, I’m always inspired to use what I have and to only buy what I really love! (it’s been awhile since I’ve been able to blurf (haha!) so I have missed your blog!)
Wow! That’s beautiful, Becca! You always surprise me with your amazing talents! TFS
Dear Becca, you are a wonderful generously giving person which is so beautifully reflected in your ongoing efforts for the joy of others.
This is too cool. You have such a talent. I love it and I have never used chipboard until Friday, and I love it. It is so much fun to make things with. Thanks for sharing.
Beautiful! You are so talented. :-)
This is beautiful! Love the felt flowers!!
Just lovely, Becca!
Too cute Becca! Adorable!
Lisa A.
Except for the fact that you make full use of today’s technology…are you sure you were not born in the wrong century? This is just an adorable idea for a ladies tea party, luncheon..you name it.Something that I can not fathom getting into, well maybe as a guest. But to make the menu and the food on it, then give the party. Oh my,my, my! God Bless You Darlin’! You are just the sweetest thing and so are your projects!
So adorable! I love everything you create! Do you mind if I ask what the designer paper is and who makes the too cute felt border? (We don’t have Hobby Lobby, but I thought I could ask a friend to look for those for me – I’d love to use them on something fun.)
Thank you, again, for all you share so generously! You are a huge blessing!
debra~
Wow! What a gorgeous design!
Just lovely! I saw the felt flower vines at HL, but wasn’t quite sure what to use them for … now I know!! Thanks for sharing.
Wow Becca, this project is gorgeous and thanks for the tutorial! BTW – it was great to meet you at the Flourishes weekend – I hope you and your family had a safe journey home! Ali
Absolutely stunning as always!!
Becca- this is just stunning!! And now you have my wheels turning.
Love all the photos and the tutorial!
Simply devine! Your menu is so eye catching. The paper is perfect. Fantastic tutorial. TFS.
I love the menu just so darling. Thanks for the work put into the tutorial.
Oh Becca! Your site is such a joy! Thank you very much for constantly amazing me with your great ideas and talent! It never fails…you always put a smile on my face and ideas in my head!
Your blog is absolutly.
Leider ist mein englisch so schlecht. Ich möchte den Blog bei mir speichern, ich hoffe, Du hast nichts dagegen.
My english are not good.
Annette
Awwwww…..that is just the sweetest project ever!
OWESOME!!!!!!!!