

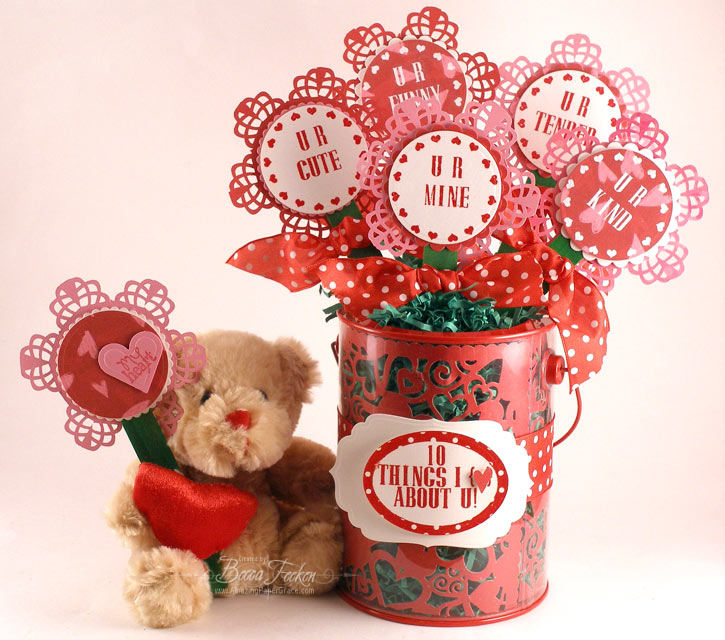
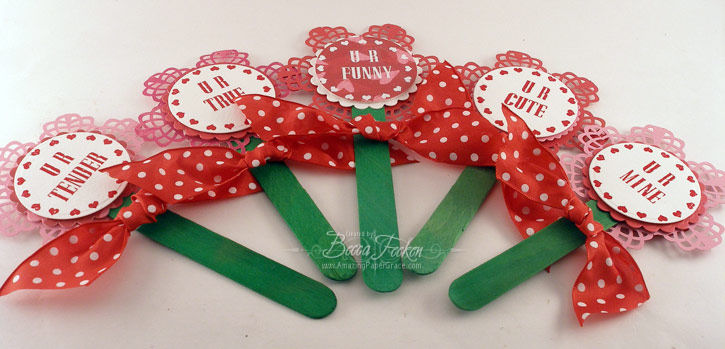
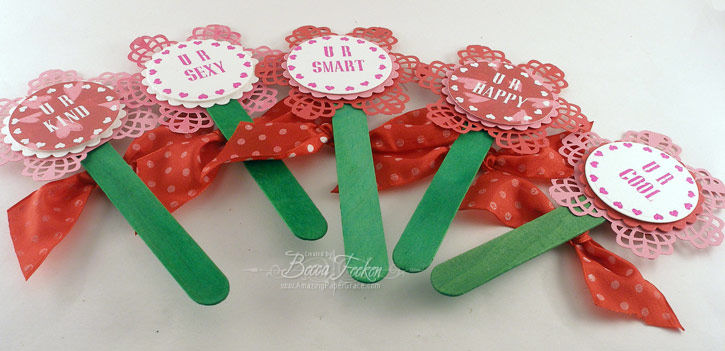
Are you ready for Valentines Day? It seems like it was just New Years and lo and behold a shocking look at the calender made me spring into action so that my sweetie will have a little surprise waiting for him on Valentines Day. This is a flower bouquet very similar to a cookie bouquet he sent me one year. The bouquet is made of 5 flowers and on each side of the flower I’ve stamped the reasons I love him so much. Below you can see both sides of the flowers. First the front side:
Then the flip side:
I’ll take you through the process of how I created them. You will see that the flowers were made with a corner punch (are you surpised?) and the technique that I’ve used here is the same that I used on this Valentines Day Card HERE, it just looks different because of the way the punch was used. I call this technique "Corner Punching an Interior Frame."
Okay, here we go. . .
For each frilly flower I stamped two sentiments using my JustRite Harmony Classic Round Stamper III with the heart border and the Brayton Font to make up the words of my choice. Once stamped, I embossed each with embossing powder then cut/emboss each sentiment with my Spellbinders Standard Circle – the circle I used here is 2 3/8" in diameter. I made a total of 10 sentiments for 5 flowers.
Next I cut a piece of cardstock 5 ½" x 5½" and cut a circle in the center with my Spellbinders Standard Circle measuring 1 7/8". I needed 5 of these for my frilly flowers used an EK Success Corner Punch to cut the frills border from the interior circle.
First I inserted the punch flip side so I could see the bottom and punched once. (See below)
For the next punch, to get my orientation, I inserted it with the punch right side up and next to the hole that I just punched. (See below)
Then I flipped the punch and cardstock over so that I could again see the bottom side of the punch, aligned according to the first punch adusting spacing as necessary. (See below)
Then I completed the second punch. (See below). Continue this around the circle until there is no more room to insert another set of two punches. (A word to the wise – practice first on plain paper to get the feel of how much spacing you will need. I after a trial, I am able to judge it by sight – you will be able to also!)
Once you’ve completed punching around the circle, there are several clips that need to be made to free your frilly flower. Start by clipping at the tip of each petal. (See below)
Next, clip at the base of each petal. (See below)
Your frilly flower or your border is now free. (See below) I was able to do this process with each of my corner punches and the each make a fabulous and unique looking frame.
Now it is time to assemble each flower. I cut/embossed scalloped circles for layering from my Spellbinders Scalloped Circles Large. The scallped circle I used was 2 5/8"
Add pop dots and glue dots as shown below. Keep the center of your scalloped circle clear as the popsicle stick needs to fit.
Stack the elements in a sandwich beginning with your first sentiment. Add Scalloped Circle. Add popsicle stick. Add Frilly Flower. Add Scalloped Circle. Add second sentiment. Finish by adding a piece of ribbon tied in a knot and secured onto stick with a glue dot. (See below)
Here is the finished flower. (See below)
To pull the bouquet together I used a clear paint can, some filler grass and floral foam. (See below) I filled the can with the filler grass almost to the top, then arranged the flowers in the floral foam then put the arrangement in the can and disguised it with the grass.
The final touch for my arrangement was a label for my can stamped with "10 Thing I {Heart} About U" using the Brayton Font and my Harmony Classic Oval Stamper II. I picked the dotted frame which matched the ribbon I was using. I stamped and embossed this in red to match the embossing from the flowers. The sentiment was then cut out with my Spellbinders Classic Oval Large, using the second largest oval, then mounted on a Spellbinders Labels Four die cut.
Check the the picture at the beginning of my post for final presentation. It was truly a fun project and I hope you liked seeing how to make a new type of frame.


Wow…this is (as usual) beautiful. I love the classiness of your cards. Intricate, clean and gorgeous. *smile*
Becca,
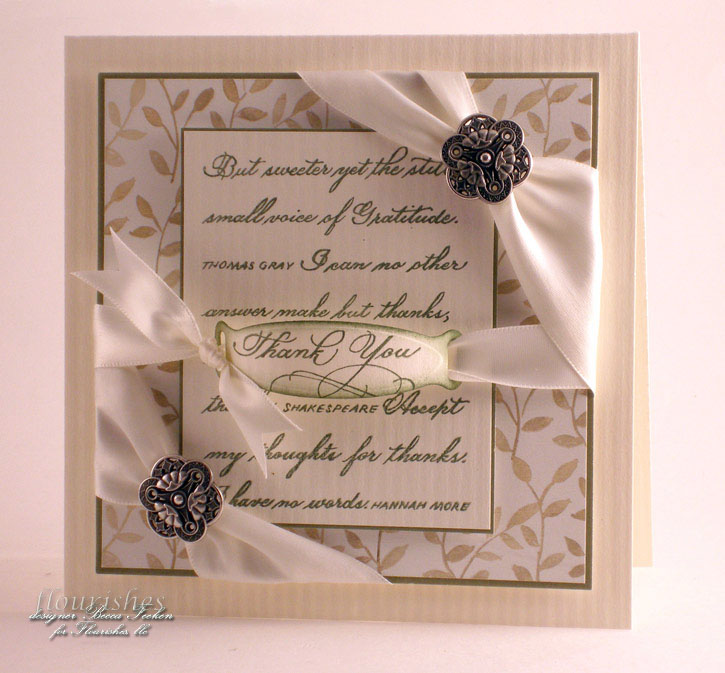
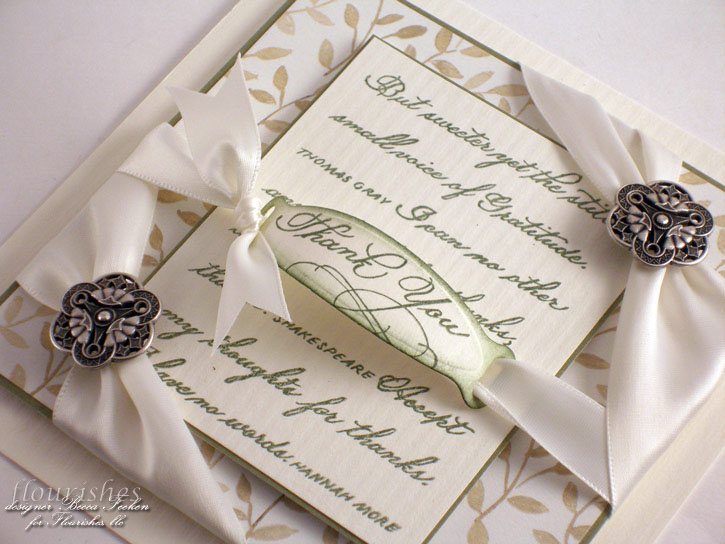
I love it when you work with the neutral colors, hey I love all the colors you work with. I love that leafy background behind the sentiment. You are gonna hate this, but I have got to know where you got it. What a great idea running the ribbon through the button shanks, it gives the ribbon that awesome gathered look. Thanks for the idea! I can’t wait to see what you create next.
Lisa A.
Oh Becca what a Truly Elegant looking card this is. I love the tone on tones always, but this card is just so beautiful. Love your old Buttons too, So Detailed. I like the way you put it all together with the touch of green on the papers edge. Such Fine details.
I must also confess I think I like it so well because the Designer paper you chose is like a wallpaper I had in the early 80s. The floral leafs are exact replicas except they were very pale beige and a soft peach colors. I liked it so well I hung it in the Kitchen……Knew I had seen it somewhere! Thanks for the recall…..LOL
Becca –
Simply beautiful as all your work always is. I am in awe.
Elaine Alen
Sweet! I’m loving this one!! Have a great day.
That hardware with the white ribbon ROCKS! Love the look of it!
A very beautiful card Becca, I love your ribbons, so elegant!
Becca,
I love it!!!!!
What you can do with buttons, paper, ink, and ribbons is just
AMAZING.
Hugs,
~~Diane~~
I love the simple elegance of this card! So beautiful!
This is so beautiful!!I love the elegant buttons and the way you used them. Just gorgeous!!
Becca, this is breathtaking! Those quotes are some of the nicest I’ve seen. This set is awesome…. I’m probably gonna have to get it, you enabler, you!!! ;o)
What an inspiration you are! This card is so elegant and your attention to details is amazing! I have a “Becca” folder that this will for sure go in!
Hugs~
freida
You are such an inspiration!!!!God Bless
I was wondering was size is the base card? I usually use 4 1/4 X 5 1/2 are yours large. I love all of your card.
Beautiful buttons and just love how the Thank you has dimension and works right into the background!
I love your work so much. It’s always so elegant and clean looking. I wish that you would include pictures of your card’s inside pages. I’m curious about them too :)
So beautiful, Becca, I love your soft colors.
Another beautiful card that I am coming to expect from you. Gorgeous and tfs.
So elegant and perfect, as always, dear Becca!
Luv’ it! Luv’ it!!
Hey girlfriend!!! How are things? This is such a beautiful card! Hope all is well with you… Rainy and dreary here in London, Ontario but hope to get rid of a BUNCH of snow… Come on SPRING!!!
Becca, this is just so beautifully elegant!!!! Love the ornate button detailing!!!! Great looking card!!!!
Great – again. What I can’t over is your cutting and pasting. All four sides are exactly the same dimension. WOW.
Sue
Super gorgeous – Becca!!! I love the elegance of your cards!!! These buttons are so beautiful – perfect for this card!!
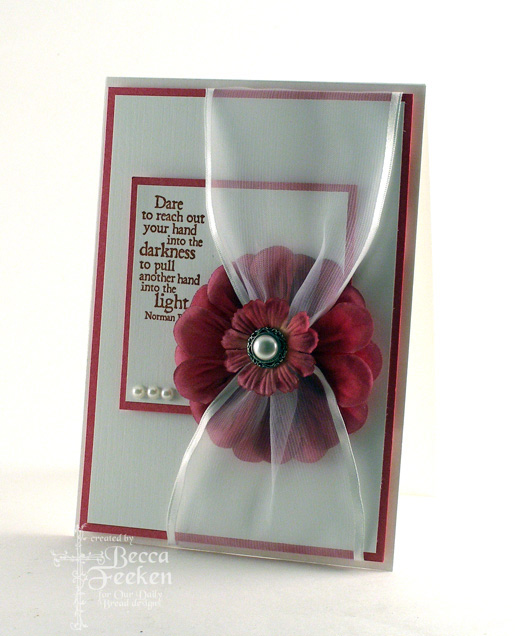
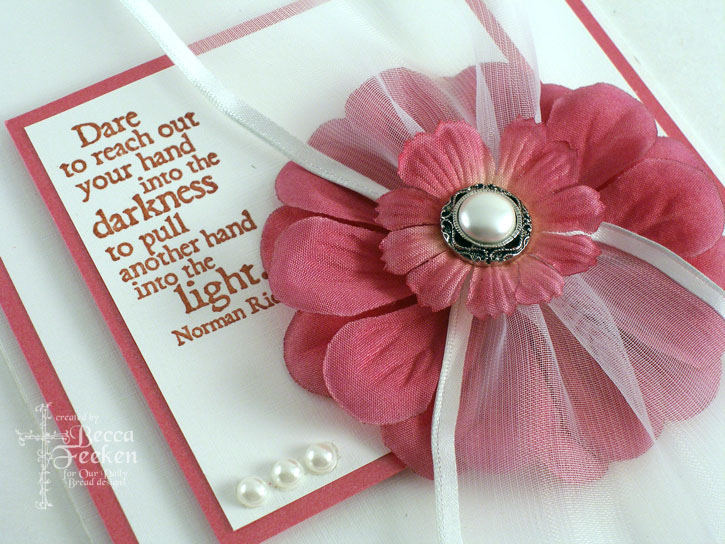
Gorgeous! Love the beautifully soft colours and the main image with the word popped up is a perfect touch!! You are a fabulously inspiring stamper!
So gorgeous, Becc!!!
So perfect…….I love the simplicity and elegance of your cards……what I always hope to achieve.
Good evening, Becca – quite late for me tonight so I’ll just say -Awesome, beautiful and elegant!!
Another elegant card. Beautiful ribbon and buttons and you just know how to put it all together so beautifully. I’m so happy I found your blog recently and love visiting and seeing all your creations. Thanks for sharing with us.
Gorgeous!! Love those silver buttons!! Very elegant!
Beautiful Card Becca!
Gorgeous!!
beautiful!
And what beautiful buttons! Such an elegant expression of gratitude. I love how you placed the main sentiment over the script, almost like a spotlight effect. So lovely!
Beautiful Becca! You know I never thought of threading ribbon through a button shank…don’t know why, it seems perfectly natural but I always cut them off! I just love it when you think for me LOL! You rock girl!